Use Cloudstack by Ikoula Panamax
en:Use Cloudstack by Ikoula Panamax
he:השתמש Cloudstack על ידי Ikoula פנמקס
ro:Utilizarea Cloudstack de Ikoula Panamax
ru:Использование Cloudstack по Ikoula Panamax
pl:Użyj Cloudstack przez Ikoula Panamax
ja:Ikoula パナマックスで Cloudstack を使用します。
ar:استخدام كلودستاك ببنما عكلة
zh:使用由 Ikoula 巴拿马 Cloudstack
de:Verwenden von Cloudstack von Ikoula Panamax
nl:Cloudstack door Ikoula Panamax gebruiken
it:Utilizzare Cloudstack da Ikoula Panamax
pt:Usar o Cloudstack por Ikoula Panamax
es:Uso de Cloudstack por Ikoula Panamax
fr:Utiliser Panamax sur Cloudstack by Ikoula
This article has been created by an automatic translation software. You can view the article source here.
If you do not know yet Panamax It is a product Open Source developed by Century Link Labs that is both a market plaThis and a Manager for containerized applications Docker from an intuitive web interfaThis .
It suffiThis s to seek the application of our choiThis then of a clique to deploy on our bodies targets using docker and one Panamax.
Panamax relies on technologies Docker, DCE, Fleet and Cloud-init included in CoreOS.
We will use in our ex ample 4 instanThis s CoreOS Update, one for the client part /Panamax UI and 3 others which will form the cluster for the part Panamax Remote Target (Panamax Remote Agent + Panamax Adapter) :
Installation of Panamax UI /API (web interfaThis /market plaThis )
On our forum dedicated to the client part of Panamax (Panamax UI /API ), downloading archive containing Installer :
core@CoreOS-PanamaxUI ~ $ sudo curl -O http://download.panamax.io/installer/panamax-latest   .tar.gz
  % Total    % ReThis ived % Xferd  Average Speed   Time    Time     Time  Current
                                 Dload  Upload   Total   Spent    Left  Speed
100 15165  100 15165    0     0  22157      0 --:--:-- --:--:-- --:--:-- 49558
It creates the directory /var/panamax where you ex tracted the installation files :
core@CoreOS-PanamaxUI ~ $ sudo mkdir -p /var/panamax
core@CoreOS-PanamaxUI ~ $ sudo tar -C /var/panamax -zxvf panamax-latest   .tar.gz
./
./Makefile
./configure
./create-docker-mount
./LICENS E
./desktop
./panamax
./.coreosenv
./README.md
./CHANGELOG.md
./ubuntu.sh
./Vagrantfile
./.version
./coreos
./Vagrantfile-win
./CONTRIBUTING.md
It is plaThis d in the directory /var/panamax and we launch the CoreOS-specific installer by specifying that you want to use the stAB le version (output truncated voluntarily ) :
core@CoreOS-PanamaxUI ~ $ cd /var/panamax
core@CoreOS-PanamaxUI /var/panamax $ sudo ./coreos install --stAB le
Installing Panamax...
Created symlink from /etc/systemd/system/Update -engine-reboot-manager.serviThis  to /dev/null.
Created symlink from /etc/systemd/system/Update -engine.serviThis  to /dev/null.
Created symlink from /etc/systemd/system/sockets.target.wants/systemd-journal-gatewayd.socket to /usr/lib64/systemd/system/systemd-

<!--T:12-->
docker pull This nturylink   /panamax-api:latest
.................
docker pull This nturylink   /panamax-ui:latest
.....
docker pull google/cadvisor:0.13.0
.........
docker pull This nturylink   /redis:latest
....
docker pull This nturylink   /dray:latest
...Created symlink from /etc/systemd/system/multi-user.target.wants/panamax-redis.serviThis  to /etc/systemd/system/panamax-redis.serv
Created symlink from /etc/systemd/system/multi-user.target.wants/panamax-dray.serviThis  to /etc/systemd/system/panamax-dray.serviThis .
Created symlink from /etc/systemd/system/multi-user.target.wants/panamax-metrics.serviThis  to /etc/systemd/system/panamax-metrics.ser
Created symlink from /etc/systemd/system/multi-user.target.wants/panamax-api.serviThis  to /etc/systemd/system/panamax-api.serviThis .
Created symlink from /etc/systemd/system/multi-user.target.wants/panamax-ui.serviThis  to /etc/systemd/system/panamax-ui.serviThis .
...
Jul 10 11:45:39 CoreOS-PanamaxUI docker[1790]: => Rails 4.1.7 application starting in production on http://0.0.0.0:3000
Jul 10 11:45:39 CoreOS-PanamaxUI docker[1790]: => Run `rails server -h` for more startup options
Jul 10 11:45:39 CoreOS-PanamaxUI docker[1790]: => NotiThis : server is listening on all interfaThis s (0.0.0.0). Consider using 127.0.0.1 (--binding option)
Jul 10 11:45:39 CoreOS-PanamaxUI docker[1790]: => Ctrl-C to shutdown server
Panamax install complete
core@CoreOS-PanamaxUI /var/panamax $
We can verify that our 5 containers Panamax are running :
core@CoreOS-PanamaxUI /var/panamax $ docker ps
CONTAINER ID        IMAGE                            COMMAND                CREATED             STATUS              PORTS                     NAMES
41a18b410427        This nturylink/panamax-ui:latest       "/bin/sh -c 'bundle    3 minutes ago       Up 3 minutes        0.0.0.0:3000->3000/tcp   PMX_UI
0cc8be fee1b7        This nturylink/panamax-api:latest      "/bin/sh -c 'bundle    3 minutes ago       Up 3 minutes        0.0.0.0:3001->3000/tcp   PMX_API
0929e65f6d55        google/cadvisor:0.13.0           "/usr/bin/cadvisor"    3 minutes ago       Up 3 minutes        0.0.0.0:3002->8080/tcp   PMX_CADVISOR
06b2219ac42e        This nturylink/dray:0.10.0          "/dray"                3 minutes ago       Up 3 minutes        0.0.0.0:3003->3000/tcp   PMX_DRAY
8a6110651DC c        This nturylink/redis:latest            "redis-server"         3 minutes ago       Up 3 minutes        6379/tcp                 PMX_DRAY_REDIS
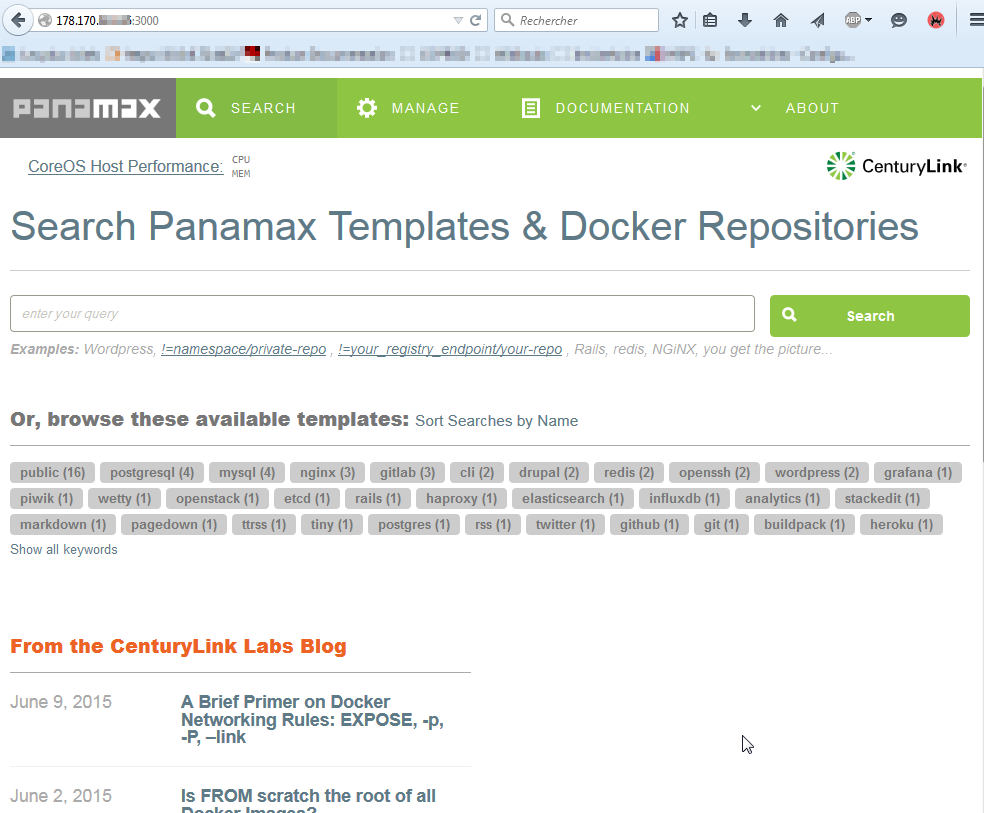
We can connect to our UI Panamax using our browser in tapping the ip of our instanThis followed by ":3000" to specify the listening port (don't forget to create permissions firewall rules and if neThis ssary port redirection ) thereof :
Installation of Panamax Remote Deployment Target
Connect to one of your 3 instanThis s CoreOS deployed for the cluster :
Generate a new URL of discovery Etcd (token s ) in a variAB le (Here : ETCD_URL ) :
core@CoreOSnode - 1 ~ $ ETCD_URL =$(curl http://discovery.etcd.io/new)
  % Total    % ReThis ived % Xferd  Average Speed   Time    Time     Time  Current
                                 Dload  Upload   Total   Spent    Left  Speed
100    58  100    58    0     0     79      0 --:--:-- --:--:-- --:--:--   101
core@CoreOSnode - 1 ~ $ echo $ETCD_URL
https://discovery.etcd.io/b8069c9bd67eae5cf19689daf4ebdd66
Then download the following cloud - config.yml template file :
core@CoreOSnode - 1 ~ $ sudo wget -NP /usr/share/oem/ http://mirror02.ikoula.com/priv/coreos/cloud-config.yml
--2015-06-16 15:37:53--  http://mirror02.ikoula.com/priv/coreos/cloud-config.yml
Resolving mirror02.ikoula.com... 80.93. A$XX.XXX , 2a00:c70:1:80:93:XX:XXX:1
Connecting to mirror02.ikoula.com|80.93. A$XX.XXX |:80... connected.
HTTP request sent, awaiting response... 200 OK
Length: 1542 (1.5K) [tex   t/plain]
Remote file is newer, retrieving.

<!--T:23-->
--2015-06-16 15:37:53--  http://mirror02.ikoula.com/priv/coreos/cloud-config.yml
Reusing ex   isting connection to mirror02.ikoula.com:80.
HTTP request sent, awaiting response... 200 OK
Length: 1542 (1.5K) [tex   t/plain]
Saving to: '/usr/share/oem/cloud-config.yml'

<!--T:24-->
/usr/share/oem/cloud-config.yml               100%[===================================================================================================>]   1.51K  --.-KB/s   in 0s

<!--T:25-->
2015-06-16 15:37:53 (264 MB/s) - '/usr/share/oem/cloud-config.yml' saved [1542/1542]
core@CoreOSnode - 1 ~ $ ex port `cat /etc/environment`
Run the following commands to customize the file cloud - config.yml downloaded with your environmental values :
core@CoreOSnode - 1 ~ $ sudo sed -i 's#DISCOVERY_URL#'$ETCD_URL '#g' /usr/share/oem/cloud-config.yml
core@CoreOSnode - 1 ~ $ sudo sed -i 's#PRIVATE_IP#'$COREOS_PRIVATE_IPV4'#g' /usr/share/oem/cloud-config.yml
We check our DCE settings and Fleet is well substituted :
core@CoreOSnode - 1 ~ $ cat /usr/share/oem/cloud-config.yml
#cloud-config

<!--T:31-->
coreos:
    units:
      - name: cloudstack-ssh-key.serviThis
        command: restart
        runtime: yes
        content: |
          [Unit]
          Description=Sets SSH key from metadata

          <!--T:32-->
[ServiThis ]
          Type=oneshot
          StandardOutput=journal+console
          ExecStart=/usr/share/oem/bin/cloudstack-ssh-key
      - name: cloudstack-hostname.serviThis
        command: restart
        runtime: yes
        content: |
          [Unit]
          Description=Sets hostname from metadata

          <!--T:33-->
[ServiThis ]
          Type=oneshot
          StandardOutput=journal+console
          ExecStart=/usr/share/oem/bin/cloudstack-hostname
      - name: cloudstack-cloudinit .serviThis
        command: restart
        runtime: yes
        content: |
          [Unit]
          Description=Cloudinit  from CloudStack-style metadata
          Requires=coreos-setup-environment.serviThis
          After=coreos-setup-environment.serviThis

          <!--T:34-->
[ServiThis ]
          Type=oneshot
          EnvironmentFile=/etc/environment
          ExecStart=/usr/share/oem/bin/cloudstack-coreos-cloudinit
      - name: etcd.serviThis
        command: start
      - name: fleet.serviThis
        command: start
    oem:
      id: cloudstack
      name: CloudStack
      version-id: 0.0.1-r3
      home-url: http://cloudstack.apache.org/
      bug-report-url: https://github.com/coreos/coreos-overlay
    etcd:
      discovery: https://discovery.etcd.io/b8069c9bd67eae5cf19689daf4ebdd66
      addr: 178.170. A$XX.XXX :4001
      peer-addr: 178.170. A$XX.XXX :7001
    fleet:
      public-ip: 178.170. A$XX.XXX
Delete the file /etc/machine-id then reboot the instanThis in order to regenerate a new machine id (your 3 instanThis s must have a different id ) :
core@CoreOSnode - 1 ~ $ sudo rm -f /etc/machine-id
core@CoreOSnode - 1 ~ $ sudo reboot
Your first instanThis should appear in the list of managed machines in Fleet :
core@CoreOSnode - 1 ~ $ fleetctl list-machines
MACHINE         IP              METADATA
7e685988...     178.170. A$XX.XXX   -
Here we can clearly see our trial in the list of machines Fleet, this will be our instanThis that will init ialize our cluster CoreOS/Etcd/Fleet.
Configurez maintenant your deux autres instanThis s CoreOS remote deployment target by following the instructions be low :
Connectez-vous à your deux autres instanThis s puis recopiez le contenu du fichier /usr/share/oem/cloud-config.yml de votre première instanThis en remplaçant uniquement l'ip thereof par l'ip de votre seconde instanThis sur votre seconde instanThis et par l'ip de votre troisième instanThis sur votre troisième instanThis (you have to pass root via a "sudo su ") :
On our second instanThis (ip address 178.170. XX. YYY ) file /usr/share/oem/cloud-config.yml will therefore the following content (identical ex This pt the ip address ) :
core@CoreOSnode - 2 ~ $ cat /usr/share/oem/cloud-config.yml
#cloud-config

<!--T:44-->
coreos:
    units:
      - name: cloudstack-ssh-key.serviThis
        command: restart
        runtime: yes
        content: |
          [Unit]
          Description=Sets SSH key from metadata

          <!--T:45-->
[ServiThis ]
          Type=oneshot
          StandardOutput=journal+console
          ExecStart=/usr/share/oem/bin/cloudstack-ssh-key
      - name: cloudstack-hostname.serviThis
        command: restart
        runtime: yes
        content: |
          [Unit]
          Description=Sets hostname from metadata

          <!--T:46-->
[ServiThis ]
          Type=oneshot
          StandardOutput=journal+console
          ExecStart=/usr/share/oem/bin/cloudstack-hostname
      - name: cloudstack-cloudinit .serviThis
        command: restart
        runtime: yes
        content: |
          [Unit]
          Description=Cloudinit  from CloudStack-style metadata
          Requires=coreos-setup-environment.serviThis
          After=coreos-setup-environment.serviThis

          <!--T:47-->
[ServiThis ]
          Type=oneshot
          EnvironmentFile=/etc/environment
          ExecStart=/usr/share/oem/bin/cloudstack-coreos-cloudinit
      - name: etcd.serviThis
        command: start
      - name: fleet.serviThis
        command: start
    oem:
      id: cloudstack
      name: CloudStack
      version-id: 0.0.1-r3
      home-url: http://cloudstack.apache.org/
      bug-report-url: https://github.com/coreos/coreos-overlay
    etcd:
      discovery: https://discovery.etcd.io/b8069c9bd67eae5cf19689daf4ebdd66
      addr: 178.170. XX. YYY :4001
      peer-addr: 178.170. XX. YYY :7001
    fleet:
      public-ip: 178.170. XX. YYY
On our third instanThis (ip address 178.170. XX. ZZZ ) file /usr/share/oem/cloud-config.yml will therefore the following content (identical to the 2 others ex This pt the ip address ) :
core@CoreOSnode - 3 ~ $ cat /usr/share/oem/cloud-config.yml
#cloud-config

<!--T:50-->
coreos:
    units:
      - name: cloudstack-ssh-key.serviThis
        command: restart
        runtime: yes
        content: |
          [Unit]
          Description=Sets SSH key from metadata

          <!--T:51-->
[ServiThis ]
          Type=oneshot
          StandardOutput=journal+console
          ExecStart=/usr/share/oem/bin/cloudstack-ssh-key
      - name: cloudstack-hostname.serviThis
        command: restart
        runtime: yes
        content: |
          [Unit]
          Description=Sets hostname from metadata

          <!--T:52-->
[ServiThis ]
          Type=oneshot
          StandardOutput=journal+console
          ExecStart=/usr/share/oem/bin/cloudstack-hostname
      - name: cloudstack-cloudinit .serviThis
        command: restart
        runtime: yes
        content: |
          [Unit]
          Description=Cloudinit  from CloudStack-style metadata
          Requires=coreos-setup-environment.serviThis
          After=coreos-setup-environment.serviThis

          <!--T:53-->
[ServiThis ]
          Type=oneshot
          EnvironmentFile=/etc/environment
          ExecStart=/usr/share/oem/bin/cloudstack-coreos-cloudinit
      - name: etcd.serviThis
        command: start
      - name: fleet.serviThis
        command: start
    oem:
      id: cloudstack
      name: CloudStack
      version-id: 0.0.1-r3
      home-url: http://cloudstack.apache.org/
      bug-report-url: https://github.com/coreos/coreos-overlay
    etcd:
      discovery: https://discovery.etcd.io/b8069c9bd67eae5cf19689daf4ebdd66
      addr: 178.170. XX. ZZZ :4001
      peer-addr: 178.170. XX. ZZZ :7001
    fleet:
      public-ip: 178.170. XX. ZZZ
Comme pour votre première instanThis , supprimez file /etc/machine-id and restart the instanThis :
core@CoreOSnode - 2 ~ $ sudo rm -f /etc/machine-id
core@CoreOSnode - 2 ~ $ sudo reboot
core@CoreOSnode - 3 ~ $ sudo rm -f /etc/machine-id
core@CoreOSnode - 3 ~ $ sudo reboot
Une fois redémarrées, your 2 other bodies were normally joined your cluster CoreOS/Etcd/Fleet :
core@CoreOSnode - 1 ~ $ fleetctl list-machines
MACHINE         IP              METADATA
6eaThis e19...     178.170. A$XX.XXX   -
7e685988...     178.170. XX. YYY   -
87e15a4a...     178.170. XX. ZZZ   -
Si your instanThis s n'ont pas rejoint le cluster, pensez à vérifier que your instanThis s peuvent bien communiquer entre elles (connections networks, firewall rules /Security group )
Now that we have a cluster CoreOS/etcd/fleet de 3 instanThis s, we will install the panamax-remote-agent as well as the panamax-adapter :
It runs the agent Panamax installation script :
core@CoreOSnode - 1 ~ $ sudo bash -c "$(curl http://download.panamax.io/agent/pmx-agent-install)"
  % Total    % ReThis ived % Xferd  Average Speed   Time    Time     Time  Current
                                 Dload  Upload   Total   Spent    Left  Speed
100   685  100   685    0     0   1756      0 --:--:-- --:--:-- --:--:--  3156
  % Total    % ReThis ived % Xferd  Average Speed   Time    Time     Time  Current
                                 Dload  Upload   Total   Spent    Left  Speed
100  8613  100  8613    0     0  27496      0 --:--:-- --:--:-- --:--:-- 27694
./
./pmx-agent
./README.md
./CHANGELOG.md
./OpenSSL .cnf
./.version
Execute cd /root/PMx-agent && ./PMx-agent to invoke agent setup script.
Then
core@CoreOSnode - 1 ~ $ sudo bash -c "$(curl http://download.panamax.io/agent/pmx-agent-install)"
  % Total    % ReThis ived % Xferd  Average Speed   Time    Time     Time  Current
                                 Dload  Upload   Total   Spent    Left  Speed
100   685  100   685    0     0   1756      0 --:--:-- --:--:-- --:--:--  3156
  % Total    % ReThis ived % Xferd  Average Speed   Time    Time     Time  Current
                                 Dload  Upload   Total   Spent    Left  Speed
100  8613  100  8613    0     0  27496      0 --:--:-- --:--:-- --:--:-- 27694
./
./pmx-agent
./README.md
./CHANGELOG.md
./OpenSSL .cnf
./.version
Execute cd /root/PMx-agent && ./PMx-agent to invoke agent setup script.
core@CoreOSnode - 1 ~ $ sudo su
CoreOSnode - 1 core # cd /root/pmx-agent

<!--T:65-->
███████╗ ██████╗  █████████╗ ██████╗  ██████████╗ ██████╗  ██╗  ██╗
██╔══██║  ╚═══██╗ ███╗  ███║  ╚═══██╗ ██║ ██╔ ██║  ╚═══██╗ ╚██╗██╔╝
██   ██║ ███████║ ███║  ███║ ███████║ ██║╚██║ ██║ ███████║  ╚███╔╝
███████╝ ███████║ ███║  ███║ ███████║ ██║╚██║ ██║ ███████║  ██╔██╗
██║      ███████║ ███║  ███║ ███████║ ██║╚██║ ██║ ███████║ ██╔╝ ██╗
╚═╝      ╚══════╝ ╚══╝  ╚══╝ ╚══════╝ ╚═╝ ╚═╝ ╚═╝ ╚══════╝ ╚═╝  ╚═╝

<!--T:66-->
<span class="notranslate">CenturyLink LAB s</span> - http://www.centurylinklabs.com/

 <!--T:67-->
1) init :          First time installing Panamax Remote Agent  ! - Downloads and installs Panamax Remote Agent .
 2) restart :       Stops and Starts Panamax Remote Agent  and adapt.
 3) Reinstall :     Deletes your current Panamax Remote Agent  and Adapter and Reinstall s latest    version.
 4) check :         Checks for availAB le Update s for Panamax Remote Agent  and adapt.
 5) Update :        Updates to latest    Panamax Remote Agent  and adapt.
 6) delete :        Uninstalls Panamax Remote Agent  and adapt.
 7) Debug :         Display your current Panamax settings.
 8) token :         Display your current Panamax Remote Agent  token .
 9) help :          Show this help
10) Quit
Please select one of the preThis ding options  :
Type 1 to install the Panamax Remote Agent :
Please select one of the preThis ding options  : 1

<!--T:70-->
Installing panamax remote agent/adapter...

<!--T:71-->
Installing Panamax adapter:

<!--T:72-->
Select the ochestrator you want to use:

<!--T:73-->
1) Kube rnetes
2) CoreOS Fleet
3) Marathon
Please select one of the preThis ding options  :
Choose the Orchestrator "2) CoreOS Fleet" and specify your ip :
Please select one of the preThis ding options  : 2


<!--T:76-->
Enter the API  endpoint to acThis ss the Fleet <span class="notranslate">cluster</span> (e.g : http://10.187.241.100:4001): http://178.170.XX.XXX:4001

<!--T:77-->
Starting Panamax Fleet adapt :

<!--T:78-->
docker pull This nturylink   /Panamax-fleet-adapter :latest

<!--T:79-->
56b22791d9b3DAC 06e2348a6a867527ffae 01a37AB 374159be 48bbafaf 77334f

<!--T:80-->
Installing Panamax remote agent :
Enter the public hostname (dev.ex   ample.com, without 'http'  ) or IP Address (ex   : 206. x.x.x ) of the agent  : Enter the public hostname (dev.ex   ample.com, without 'http'  ) or IP Address (ex   : 206. x.x.x ) of the agent  : 178.170. A$XX.XXX
Enter the port to run the agent on (3001):

<!--T:81-->
Generating SSL Key

<!--T:82-->
docker pull This nturylink   /OpenSSL :latest

<!--T:83-->
Generating RSA private key, 1024 bit long modulus
......++++++
..............................................................................++++++
e is 65537 (0x10001)
Generating a 4096 bit RSA private key
........................................................................................++
................................................................++
writing new private key to '/certs/pmx_remote_agent.key'
-----
No. value provided for Subject Attribute C, skipped
No. value provided for Subject Attribute ST, skipped
No. value provided for Subject Attribute L, skipped
No. value provided for Subject Attribute O, skipped
Signature ok
subject =/CN =178.170. A$XX.XXX
Getting Private key

<!--T:84-->
Starting Panamax remote agent :

<!--T:85-->
docker pull This nturylink   /Panamax-remote-agent :latest

<!--T:86-->
524BC 3b7DB 813d2f20f8DC 028037This 8f42ecfc 05EBE  8c4f67a172e3f6125DC 44

============================== START ============================== <!--T:87-->
aHR 0cHM 6LY 8xNzguMTcwLjY 4LjE 1NzozMDAxfDdiYzExYjNiLTMxZDEtNGM 1NS 1hZWNlLWFmNTRk
NGQ 1NzkzNHxOVGs 1TUdNMk 5tVXRNV 0UzWlMwME 1EUmhMVGc 1T0RNdFpqZGhZVEJqWTJVM 1ptSm 1D
ZZ 09fC 0tLS    0tQkVHSU 4gQ 0VSVElGSUNBVEUtLS     0tLQpNS UlGRmpDQ0F2NmdBd 0lCQWdJSkFKb 003
cDJiRTd 6to the 1BMEdDU 3FHU 0liM 0RRRUJCUVVBTUJreE Z 6QVZCZ 05WCkJBTU 1EakUzT 0M0eE 56QXVO
AMD 1TVRVM 01CN FhEVEUxTURZeE 5qRTBOVGt 6TjFvWERURTJNRFl 4TlRFME 5UA 3oKTjFvd 0dURVhN
QlVHQTFVRUF 3d09NVGM 0TGpFM 01DNDJPQzR 4TlRjd 2dnSWlNQTBHQ 1NxR 1NJYjNEUUVCQVFVQQpB
NElDRHdBd 2dnSUtBb 0lDQVFDZHFmOFVZM 21RWnJpUTd LS TVJV 0RuNkJuS 3lIclkxTitZeE  1OaVlj
WnRKSm 5yCmt 3UlhDQzRVelNDNEdrMmszcFIzeHppd 0Pine 1VUYmRwMXUrQlhnYjgvVHV 3dDhENUxp
MVovUzRudmVoUlA 4N0YKa 0trcENpeU 8zUllyQXc 0QkFqZVkvb 2JSEM 5nN 2Y0T2dXYWhaamhnV 201
SUJ 0dWdndXVCTEVUcHNIcERXZWJpSQpOT 0I3V2ZEQkh 0RmRydkpLMEU 2dEJzNjdVVkg 0ZHdLNVcx
c0dNdjRsQTY 4TGczdmFlWVpobHk 0NGFpeGlPWUIzClV 6TlUzN 3h3eXFFbnVnU 2MvM 2x3VzhVRVdU
XXXXXXXXXXXXXXXXXXXXXXXXXXXXXXXXXXXXXXXXXXXXXXXXXXXXXXXXXXXXXXXXXXXXXXXXXXXX
XXXXXXXXXXXXXXXXXXXXXXXXXXXXXXXXXXXXXXXXXXXXXXXXXXXXXXXXXXXXXXXXXXXXXXXXXXXX
XXXXXXXXXXXXXXXXXXXXXXXXXXXXXXXXXXXXXXXXXXXXXXXXXXXXXXXXXXXXXXXXXXXXXXXXXXXX
XXXXXXXXXXXXXXXXXXXXXXXXXXXXXXXXXXXXXXXXXXXXXXXXXXXXXXXXXXXXXXXXXXXXXXXXXXXX
XXXXXXXXXXXXXXXXXXXXXXXXXXXXXXXXXXXXXXXXXXXXXXXXXXXXXXXXXXXXXXXXXXXXXXXXXXXX
XXXXXXXXXXXXXXXXXXXXXXXXXXXXXXXXXXXXXXXXXXXXXXXXXXXXXXXXXXXXXXXXXXXXXXXXXXXX
XXXXXXXXXXXXXXXXXXXXXXXXXXXXXXXXXXXXXXXXXXXXXXXXXXXXXXXXXXXXXXXXXXXXXXXXXXXX
XXXXXXXXXXXXXXXXXXXXXXXXXXXXXXXXXXXXXXXXXXXXXXXXXXXXXXXXXXXXXXXXXXXXXXXXXXXX
XXXXXXXXXXXXXXXXXXXXXXXXXXXXXXXXXXXXXXXXXXXXXXXXXXXXXXXXXXXXXXXXXXXXXXXXXXXX
cDBvTHdpOXVtS 0VWeFQ 5VjYrL 1JsL 3VoRHBlV 09NC 3FOaVkyanBRVkhpZ 1lWVVpKYlJhZ 2xIbk 42
NDBXZApRZUZBTnMvT 29aQTFrdDN 1cFR 5MmtlVWljLzMzTzlidTArU 0hFUEZpd 2PAAs 3dkUURudXl 4
dGVRNnBJVEhhVDdSCmVoWEdDdDRmVXBSUjZsT 2xGWjRTS  2JjQmtBa 3dZa 2V5Y0N5VTltTkV 3YK 1R
M0xJZmY 5K0pSa 3hqTXQ 1YnRzTHgKWDk 2d08zWURBYK c2NmxmQkh 1TTJLNWZVck 1yWDlUbmpmN 0x5
Z0hjcnJW WmFiK 2JjUkM 2SzZVQnI 1RTl 4R2xKNgpGZHZMdkUySW 5uQjkrRzIrM 2V1Fxh 6UXVFWGpB
K2ZZ UDJReDRJU2w3NGpYaTRWa 3Ziem 41TnhUVHJsRzNaYK 9WCkp 3NTRmV 21lOHRwQ 2N4Vit 2V2JW
M0tCZ 2JpMXRlKzRKTFZuV 1VKTlpVUng 5K2VUTG 82UTd 2TM 1iSG 1RTS 8wOHIKVWZIR 1JSOGlPZGwr
NjlDZjNlUWwvenhCSVE 2cXN 4bGxzWTJMd 3IvMGFFto the RuUDRtNk5WUEtuSmN 4VDNNbTRuZwp 4TjdR
Fxh 6V08rWUdhdUVhaHNMUkF 2QXhleFVPZkkrUHlmT 0lYVFova 1hJW jA1VWxVU 3RoYUJ 3bzFXRlVI
VnFWCjhxU 1pjdEU 0UGRneE xSejNXclltZTdVWTJEbWJuUkJOVHlFOW0yeFJPVEh 6RUlQWTdDVXZ 3
MDh 0ZFpHczNkbG 8KbVdPSVcwMGk 1MEROa 1ArT 1RyWm 5OcHU 3VVRjL 3ZPQ 3hSaGJyM 1o4OTNyWXA 3
SUlKT 0VQWUFjT 1pzMHRkQWNvQwowSldRRTZZ UnFRT1dCQT 09CI 0tLS    0tRU 5EIENFUlRJRklDQVRF
LS 0tLS    0K
============================== END  ==============================


<!--T:88-->
Copy and paste the AB ove (Not including start /end tags ) to your local panamax client to connect to this remote agent.


<!--T:89-->
Remote Agent /Adapt installation complete !


<!--T:90-->
CoreOSnode - 1 PMx-agent #
Comme This la est indiqué en fin d'installation, vous devez copier-coller (without these tags START rows /END ) the private key of your remote agent panamax in the Panamax UI during the creation of your Panamax Remote Deployment Target.
Add your Panamax Remote Deployment Target to your UI Panamax
To add your Panamax Remote Deployment Target dans votre Panamax UI , connectez-vous à This lle-ci via votre navigateur :
- go in "MANAGE"
- Click on the name of a template regardless of which for the moment (ex : "WordPress with MySQL ")
- Click on the button "Run Template"
- Click on "Deploy to Target" :
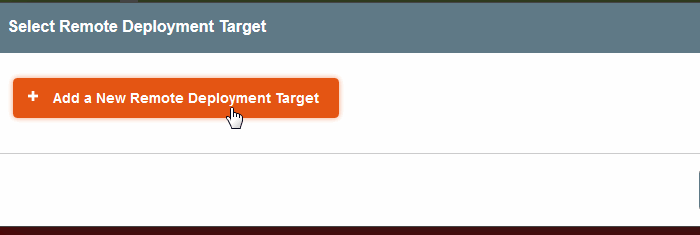
- Click on "Add a New Remote Deployment Target"
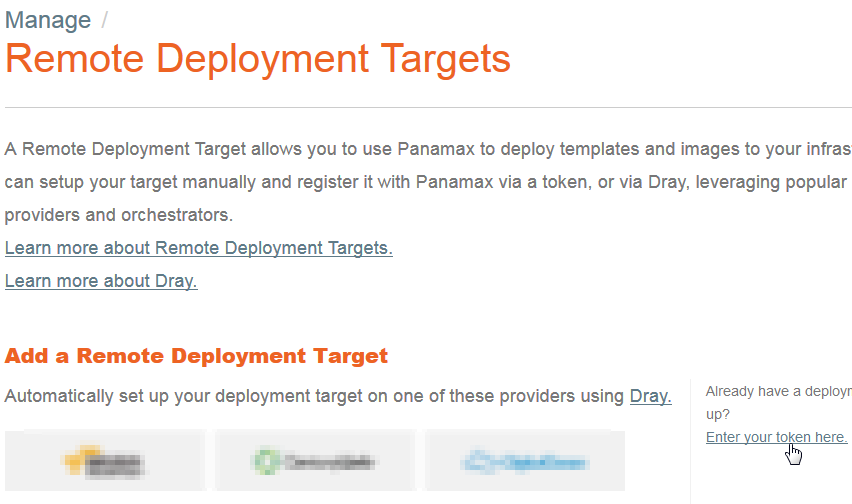
- Click on "Enter your token here." (bottom right of page )
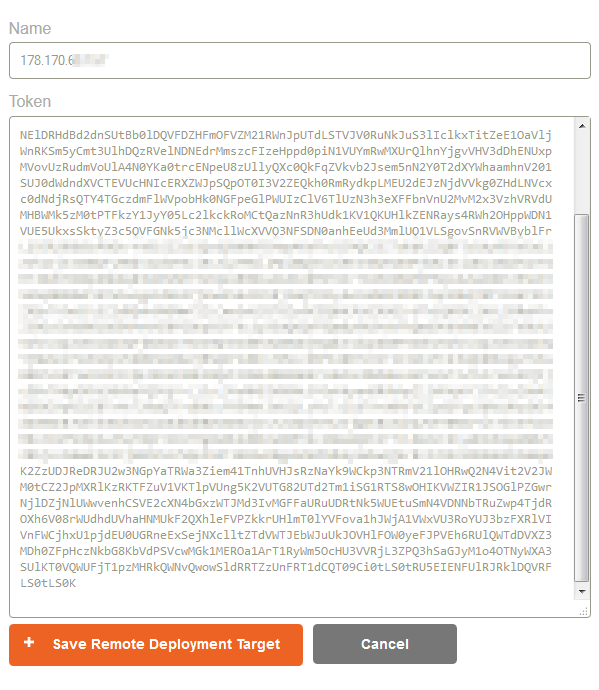
- Saisissez l'ip address de votre Panamax Remote Agent (that you have set during its installation in the fields "Name") then copy - paste the key private agent returned at the end of the installation of Panamax Remote Agent (without the tags lines START/END).
- Click on "Save Remote Deployment Target"
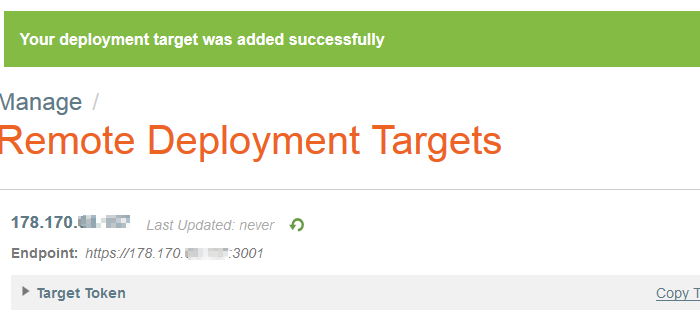
You should have the following output :
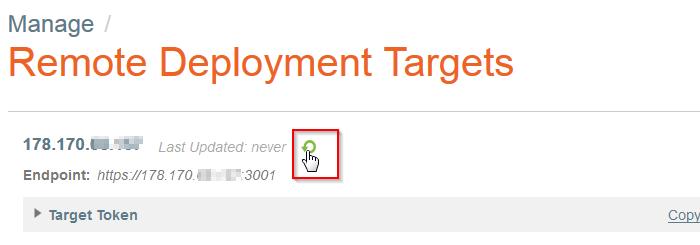
- Click on la flèche verte à gauche du nom de votre Remote Deployment Target puis forThis r une première mise à jour :
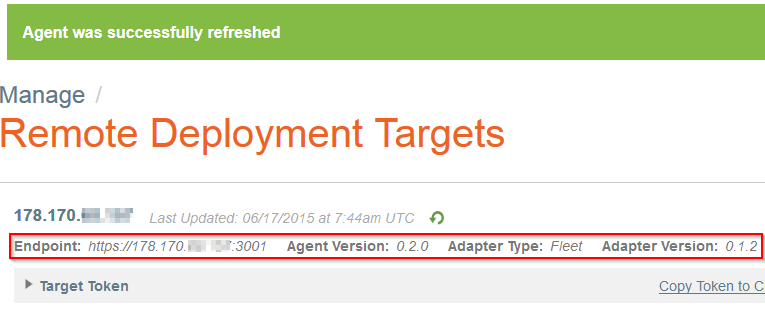
After update, information on your Remote Deployment Targets such as the version of your Panamax Remote Agent, the type of your Panamax Adapter and its version :
Deploying an application via Panamax UI
Il vous est maintenant possible de déployer une application disponible dans la market plaThis "Panamax Templates & Docker Repositories" depuis votre Panamax UI sur votre Panamax Remote Deployment Target :
- Locate the name of the application you want to deploy. We choose the template Century Link "Wordpress with MySQL"
- Vous pouvez Click on "More Details " For more information on the template that you have selected. You can also see how much image (s) Docker template consists (in our case 2 images )
- Click on "Run Template" pour déployer le menu et cliquez sur "Deploy to Target" :
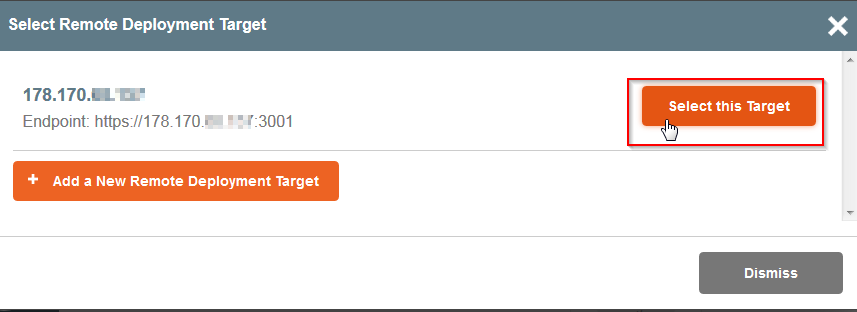
- Click on "Select this Target" to select your Remote Deployment Target
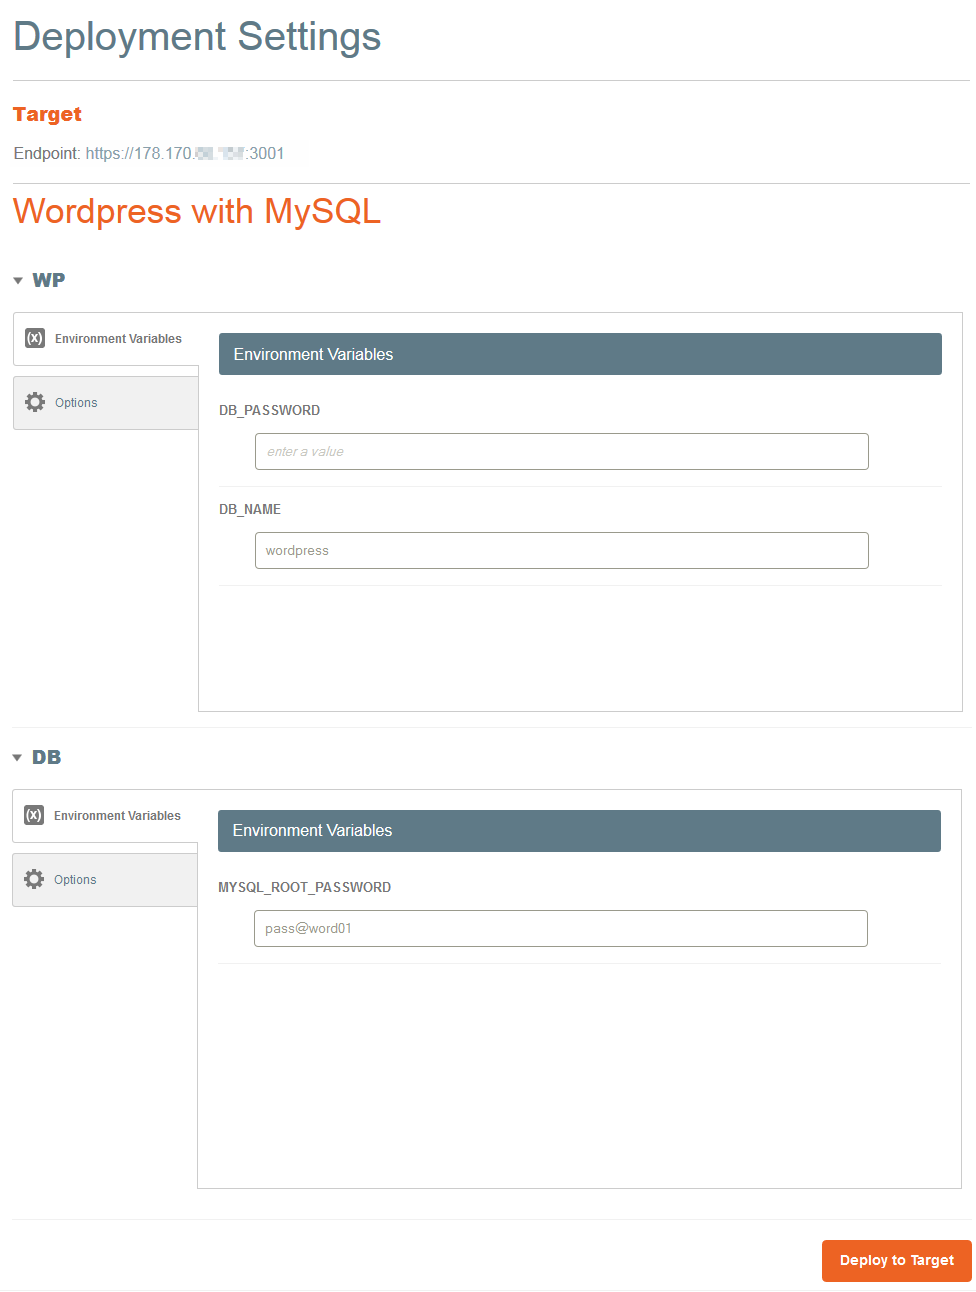
- Fill in any fields of "Deployment Settings" the application that you deployed (mot de passe, variAB les d'environnement,etc.) puis Click on the button "Deploy to Target" below to validate
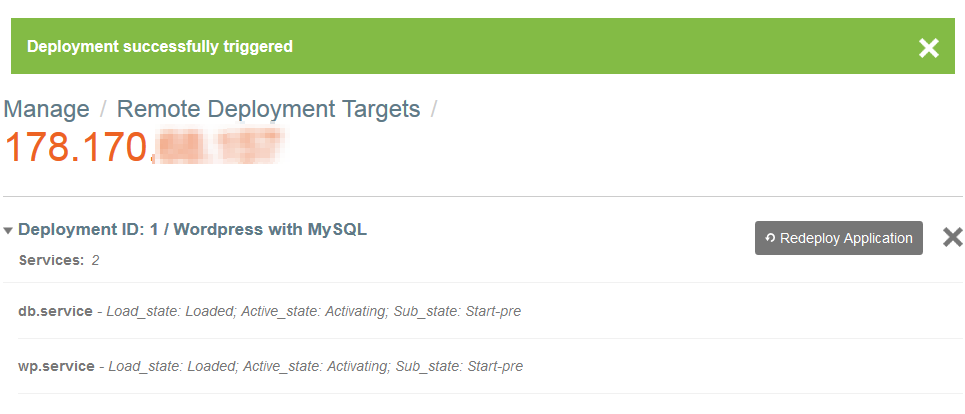
- You should have the following output :
Si vous vous connectez à your instanThis s de votre cluster CoreOS, you will see that Panamax has allocated the Docker containers on different nodes /instanThis s de votre cluster CoreOS :
- We can see that the image centurylink/wordpress a été déployée sur notre première instanThis CoreOS :
core@CoreOSnode - 1 ~ $ docker ps
CONTAINER ID        IMAGE                                      COMMAND                CREATED             STATUS              PO                                                        RTS                     NAMES
3206bda4e534        This nturylink/wordpress:3.9.1                "/run.sh"              3 minutes ago       Up 3 minutes        0.                                                        0.0.0:8080->80/tcp     wp
84e3c5fe1886        This nturylink/Panamax-remote-agent :latest       "/panamax-remote-age   37 minutes ago      Up 37 minutes       0.                                                        0.0.0:3001->3000/tcp   pmx_agent
71009f7785d3        This nturylink/Panamax-fleet-adapter :latest      "rackup '-E producti   37 minutes ago      Up 37 minutes       92                                                        92/tcp                 pmx_adapter
- And the image centurylink/mysql sur notre troisième instanThis de notre cluster :
core@CoreOSnode - 3 ~ $ docker ps
CONTAINER ID        IMAGE                   COMMAND                CREATED             STATUS              PORTS                     NAMES
84deeadd66fa        This nturylink/mysql:5.5   "/usr/local/bin/run"   4 minutes ago       Up 4 minutes        0.0.0.0:3306->3306/tcp   DB
- Nous pouvons également avoir This rtaines informations relatives aux déploiements des applications effectués via Panamax UI par l'intermédiaire de notre gestionnaire de cluster DCE :
We find our 2 applications (Wordpress "WP" et MySQL "DB") :
core@CoreOSnode - 1 ~ $ etcDC tl ls --recursive /app
/app/DB
/app/DB/DB_SERVICE_HOST
/app/WP
/app/WP/WP_SERVICE_HOST
On peut également voir sur quel instanThis membre de notre cluster the application was deployed :
core@CoreOSnode - 1 ~ $ etcDC tl get /app/DB/DB_SERVICE_HOST
178.170. A$XX.XXX
core@CoreOSnode - 1 ~ $ etcDC tl get /app/WP/WP_SERVICE_HOST
178.170. XX. ZZZ
- Nous pouvons aussi avoir le statut des applications de notre cluster par Fleet qui le gestionnaire des applications dans notre cluster :
core@CoreOSnode - 1 ~ $ fleetctl list-unit-files
UNIT            HASH    DSTATE          STATE           TARGET
DB .serviThis       0caad43 launched        launched        6eaThis e19.../178.170. A$XX.XXX
wp.serviThis       417826f launched        launched        7e685988.../178.170. XX. ZZZ
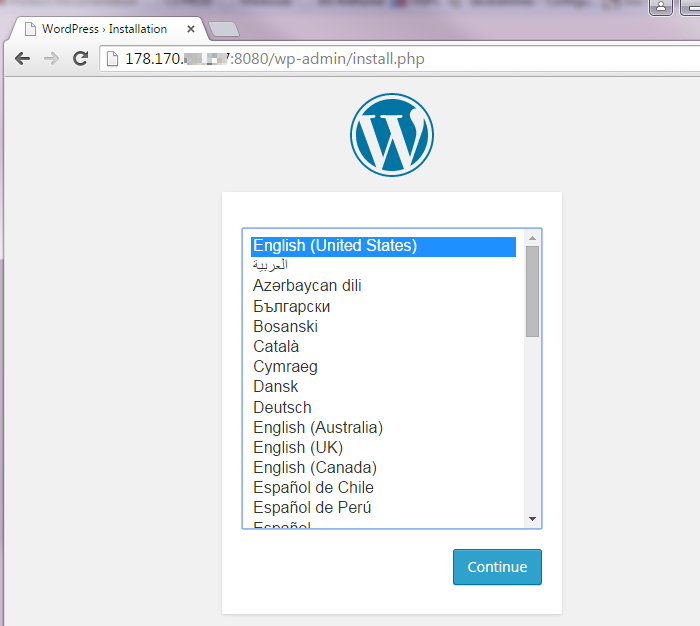
- We can check the proper functioning of our Wordpress by accessing it with the information provided in the details of the template (in our case on port 8080 ouvert au niveau du parefeu préalAB lement, nous aurions pu faire une redirection de port du 8080 on port 80 public dans le cas d'instanThis s en zone avancée) :
This article seemed you to be useful ?




Enable comment auto-refresher