How to resize the volume its Linux instance rootdisk
en:How to resize the volume its Linux instance rootdisk
he:כיצד ניתן לשנות את גודל אמצעי האחסון שלה rootdisk מופע של לינוקס
ro:Cum pentru a redimensiona volumul său rootdisk de exemplu Linux
ru:Как изменить размер тома его rootdisk экземпляр Linux
pl:Jak zmienić rozmiar woluminu jego partycja wystąpienie Linux
ja:その Linux インスタンスのルート ボリュームのサイズを変更する方法
ar:كيفية تغيير حجم وحدة التخزين في روتديسك مثيل لينكس
zh:如何调整音量大小其 Linux 实例 rootdisk
de:Wie man dem Volumen ihrer Linux-Instanz Rootdiskette Größe
nl:Hoe te resize het volume zijn Linux aanleg rootdisk
it:Come ridimensionare il volume relativo rootdisk istanza di Linux
pt:Como redimensionar o volume de seu Linux instância rootdisk
es:Cómo cambiar el tamaño el volumen de su Linux instancia rootdisk
fr:Comment redimensionner le volume rootdisk de son instance Linux
Introduction
If you have deployed a GNU/Linux instance with an old "Sponsored" model (prepared by our teams) with a 50GB rootdisk volume and want to enlarge it, this KB explains how to proceed. If on the contrary you have deployed a GNU/Linux Instance with our new "Sponsored" model (prepared by our teams) with a rootdisk volume of 10GB you can follow the second part of this KB.
PS: Enlarging a volume outside ROOTDISK will automatically have to be done with the manual procedure exposed for older models.
Procedure for older Models
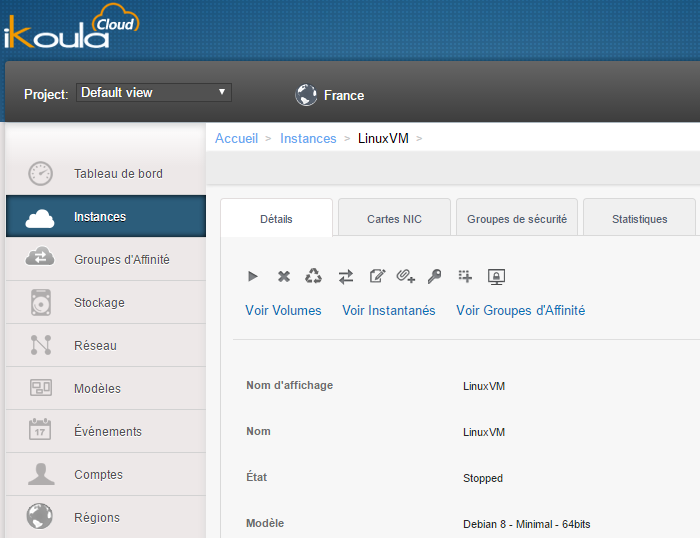
In our example, it is an instance deployed with the sponsored template "Debian 8 - Minimal - 64 bits":
This one has a rootdisk volume of 50GB and we want to increase its size by 10GB in our example.
Preparation
- First of all your instance must be stopped, stop your instance if it is not already the case
- Click on "View Volumes" (in the "Details" tab of your instance):
- Click on the name of the roodisk volume of your instance:
- Click on the "Resize Volume" icon:
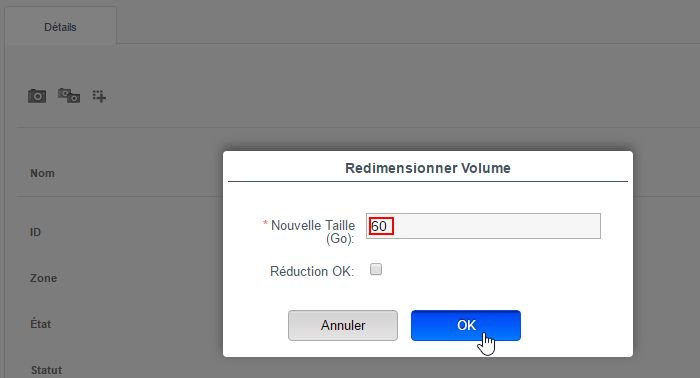
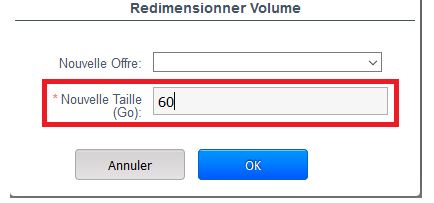
- Enter the new size you want for your rootdisk volume (in our case we want to enlarge by 10GB so 50 + 10 is a new size of 60GB) then click OK to validate:
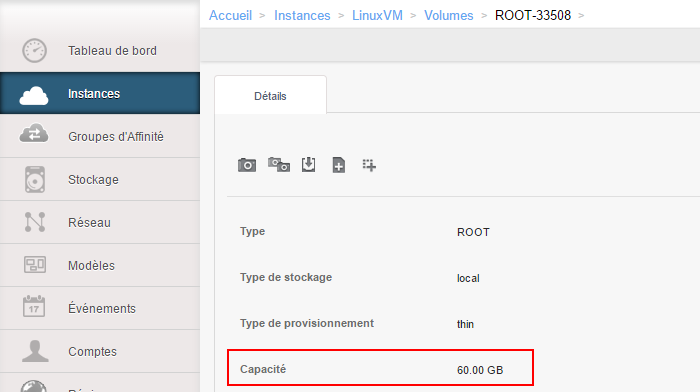
- Check the new size of your rootdisk volume in the interface:
Check
- Verify the new size of your rootdisk volume at your system level (corresponds to /dev/xvda):
Here we can see that our virtual disk /dev/xvda (rootdisk volume) is 60G, the new size.
Redimensioning the file system
- Create a new partition with the new disk space:
First we check where the last current partition (/dev/xvda5) ends:
We create the new partition from the end of the last current partition +1MB and taking all the free space either:
We check, we have a new primary partition /dev/xvda3 which is 10G in our case:
We set the type of our new partition (3rd partition, hence the "set 3") in LVM (not an obligation unless we want to create a new LVM PV that will extend the current LVM volumes):
- We create a new PV (physical volume) LVM with our new partition:
- We expand the existing LVM volume group (VG) with our new PV:
- Now we can create a new LVM volume (LV) or resize an existing LV(s). We choose to extend the existing "root" LV which corresponds to the root of our system:
Before extension:
We extend our root LV with 100% of the available free space of our volume group (VG), that is 10G in our example:
We check:
Our "root" LVM volume (LV) has increased, in our case, from 48.13g to 58.13g, i.e. 10g more.
- Resize the file system of your LV /dev/vg01/root so that it uses all the disk space:
Before resizing:
We resize to take into account the new disk space of our LVM:
We check:
Our file system of our LVM "root" is now well 58G or 10G more.
==Procedure for new templates==]
In order to design Templates allowing to adjust automatically at the first startup Ikoula to integrate a series of scripts "Cloudinit". One of them allows the resizing of the root partition of your linux system automatically at the first boot of the instance.
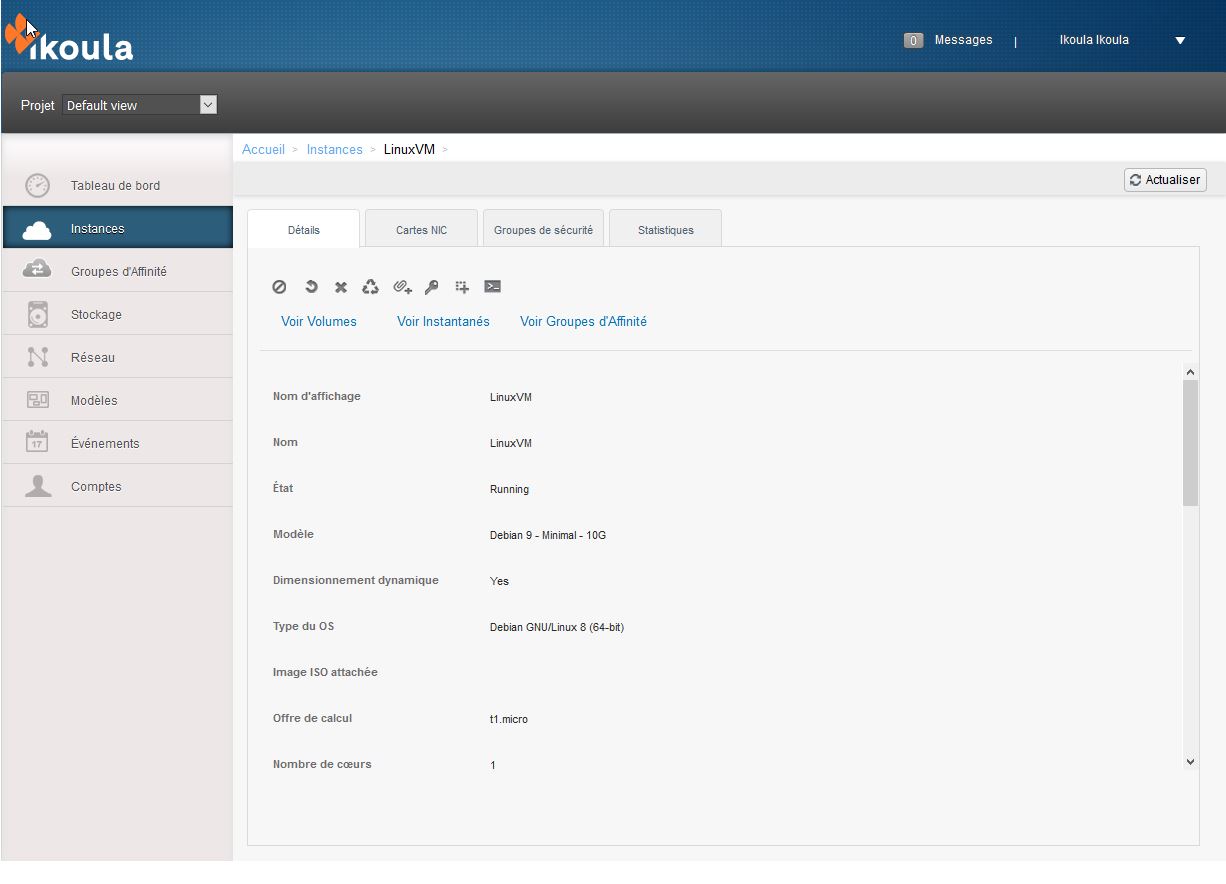
In our example, it is an instance deployed with the sponsored template "Debian 9 - Minimal - 64 bits":
This one has a ROOTDISK volume of 10GB and we want to increase its size by 50GB in our example.
Preparation
In order to be able to reuse the script of enlarging the partition and the file system we will need to delete a simple log file present in the /var/lib/cloud/sem/ directory
PS: This operation will have to be done again at each operation of enlargement of the ROOTDISK
You will be able to do it very simply this way:
root@LinuxVM:~# ls -la /var/lib/cloud/sem/*
-rw-r--r-- 1 root root 24 Aug 22 10:14 /var/lib/cloud/sem/config_scripts_per_once.once
You must first remove the presence of this file
root@LinuxVM:~# rm /var/lib/cloud/sem/*
You can then shut down your instance and proceed to resize your ROOTDISK to the desired final size.
Resizing the rootdisk and file system
- Go to the CloudStack Ikoula One management interface and click on "View Volumes" (in the "Details" tab of your instance):
- Click on the ROOTDISK volume name of your instance:
- Click on the "Resize Volume" icon:
- Enter the new size you want for your volume ROOTDISK (in our case we want to enlarge by 50GB so 10 + 50 is a new size of 60GB) then click OK to validate :
PS: Ikoula provides only one service offering of type ROOTDISK for public offerings, so you don't have to make any changes on this side.
- Check the new size of your ROOTDISK volume at the interface:
- Start your instance
- Check the new size of your volume at the system level (corresponds to /dev/xvda):
root@LinuxVM:~# lsblk /dev/xvda
NAME          MAJ:MIN RM  SIZE RO TYPE MOUNTPOINT
xvda          202:0    0   60G  0 disk
├─xvda1       202:1    0    1M  0 part
├─xvda2       202:2    0  512M  0 part /boot
└─xvda3       202:3    0 59.5G  0 part
  ├─vg01-swap 254:0    0    1G  0 lvm  [SWAP]
  └─vg01-root 254:1    0 58.5G  0 lvm  /
- Let's check that the LVM volume is extended with the space added to the disk
root@LinuxVM:~# parted -s /dev/xvda unit MB print
Model: Xen Virtual Block Device (xvd)
Disk /dev/xvda: 64425MB
Sector size (logical/physical): 512B/512B
Partition Table: gpt
Disk Flags:

Number  Start   End      Size     File system  Name  Flags
 1      1.05MB  2.10MB   1.05MB                      bios_grub
 2      2.10MB  539MB    537MB    ext2         boot
 3      539MB   64424MB  63886MB                     lvm
- We can do a final check on the file system itself /dev/mapper/vg01-root :
root@LinuxVM:~# df -hT
Filesystem            Type      Size  Used Avail Use% Mounted on
udev                  devtmpfs  483M     0  483M   0% /dev
tmpfs                 tmpfs      98M  472K   97M   1% /run
/dev/mapper/vg01-root ext4       58G  1.2G   54G   2% /
tmpfs                 tmpfs     488M     0  488M   0% /dev/shm
tmpfs                 tmpfs     5.0M     0  5.0M   0% /run/lock
tmpfs                 tmpfs     488M     0  488M   0% /sys/fs/cgroup
tmpfs                 tmpfs     488M     0  488M   0% /tmp
tmpfs                 tmpfs     488M     0  488M   0% /var/tmp
tmpfs                 tmpfs     488M     0  488M   0% /run/shm
/dev/xvda2            ext2      504M   35M  444M   8% /boot
tmpfs                 tmpfs      98M     0   98M   0% /run/user/0
Your system now has the added space.
Reduce the size of the rootdisk
It is not possible to reduce the size of the ROOTDISK, Ikoula provides sponsored Template of the three major GNU/Linux distributions fixed at 10GB.
If you still want to use an instance with a smaller ROOTDISK, you will need to create a Template. You can follow this article discussing how Ikoula's sponsored templates are designed. How_create_a_compatible_Ikoula_Cloud_template
PS : Please note that the aggandisement of a root disk is definitive, you will not be able to go back except by recreating a smaller template.




Enable comment auto-refresher