How to create a network interface for a VPN connection via the Windows utility
fr:
This article has been created by an automatic translation software. You can view the article source here.
he:כיצד ליצור ממשק רשת של חיבור VPN באמצעות תוכנית השירות של Windows
ro:Cum de a crea o interfaţă de reţea pentru o conexiune VPN prin utilitarul Windows
ru:Как создать сетевой интерфейс для подключения VPN через утилиту Windows
pl:Jak utworzyć interfejsu sieciowego dla połączenia sieci VPN za pomocą narzędzie Windows
ja:Windows ユーティリティ経由で VPN 接続のネットワーク インターフェイスを作成する方法
ar:كيفية إنشاء واجهة شبكة اتصال VPN عبر الأداة المساعدة Windows
zh:如何创建 Windows 实用程序通过 VPN 连接的网络接口
de:Eine Netzwerk-Schnittstelle für eine VPN-Verbindung über das Windows-Dienstprogramm erstellen
nl:Hoe maak je een netwerkinterface voor een VPN-verbinding via het Windows-hulpprogramma
it:Come creare un'interfaccia di rete per una connessione VPN tramite l'utilità di Windows
pt:Como criar uma interface de rede para uma conexão VPN através do utilitário do Windows
es:Cómo crear una interfaz de red para una conexión VPN mediante la utilidad de Windows
en:How to create a network interface for a VPN connection via the Windows utility
I want to connect to my VPN L2TP/IPsec via the configuration utility Windows
Method through the network and sharing Center
- To do this, you must go in the network and sharing Center as shown in the screenshot below :
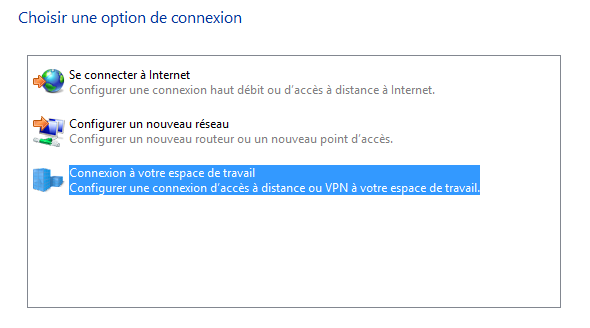
- In the window that pops up to you, click Connect to your workspace.
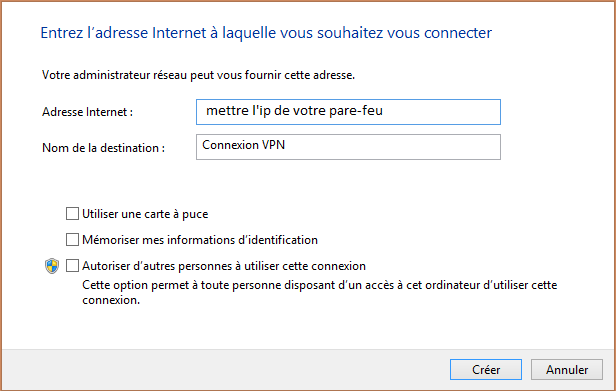
- Click use my Internet connection (VPN).
- Enter the different connection information (Address, name of the destination).
Method via the Metro interface (Windows 10)
- Pour ce faire, cliquer sur le menu Paramètres du menu démarrer:
- Une nouvelle fenêtre s'ouvre alors, cliquer ensuite sur le bouton se nommant Réseau et Internet:
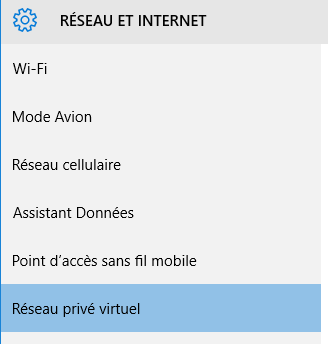
- Vous pouvez créer ici une multitude de type de connexion, nous sélectionnons ici Réseau privé virtuel:
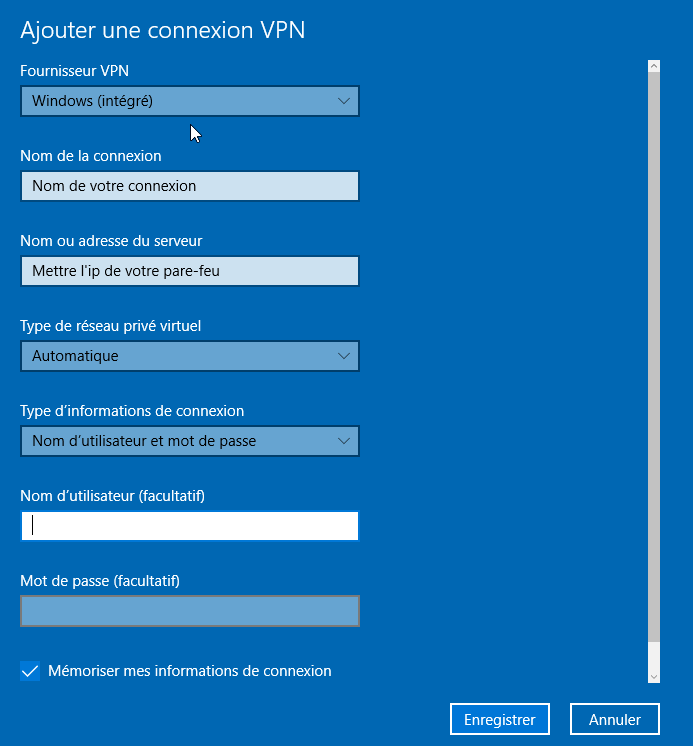
- Vous devez ensuite cliquer sur le bouton Ajouter une connexion VPN:
- The creation of your connection VPN appears now page, you can perform the configuration as follows:
Next steps (common to both methods)
- Creates a new Internet connection in summer (In our case - VPN connection).
- Right click then property and you go to the Security tab.
- In the menu drop-down - Type of VPN network - Choose Protocol L2TP (Layer 2 Tunneling Protocol) with IPsec (L2TP/IPsec)
- Go into the settings advanced then checked using a pre-shared for authentication, save your pre-shared key and validate your information.
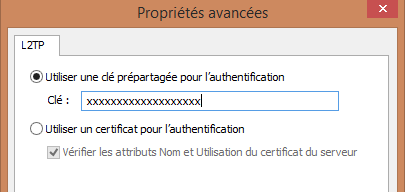
You now have a working VPN connection through the Windows utility. However all of the traffic will have an IP output corresponding to your equipment because that will only flow through this.
If you want to redirect traffic destined for your Ikoula equipment that, it will be necessary to make the following change:
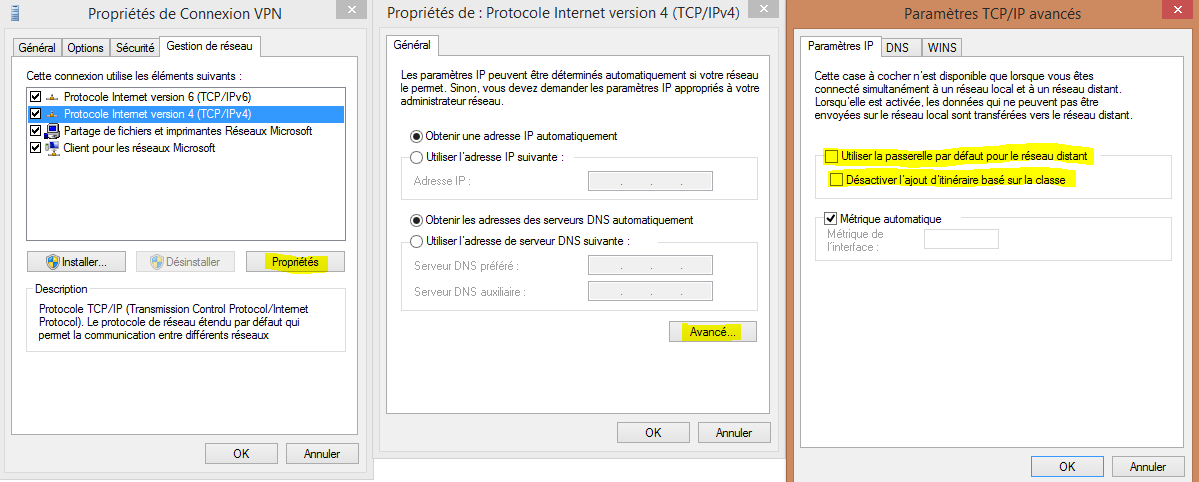
- Go to the Management tab of network, then in the properties of the Protocol API4, and finally in the advanced configuration.
- Uncheck the two highlighted parameters as shown on the screenshot below and validate information :
Due to this change we should not forget to manually add the corresponding roads:
#Sous windows
route add [IP.Destination] [Masque] [Passerelle]

#Sous linux
route add -net [IP.Destination] netmask [Masque] gw [Passerelle]
- Finally, double click on the created VPN connection and fill in your login.








Enable comment auto-refresher