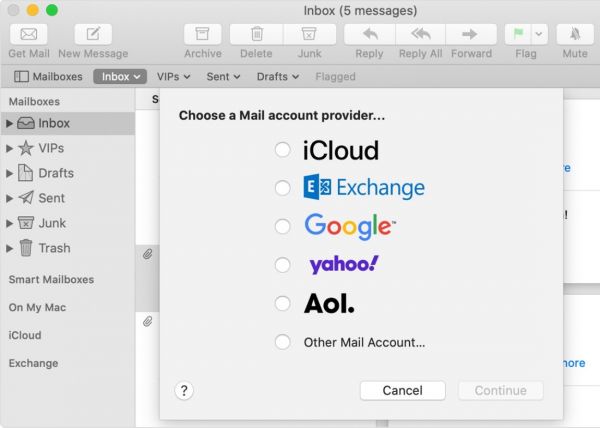
Add an email account on your mac manually
Handmatig een e-mailaccount op uw mac toevoegen en:Add an email account on your mac manually
I. Add an email account
If you haven't already set up an email account in Mail, you might be prompted to add one when you open the app. If you're not prompted, or you just want to add another account, follow these steps:
1. From the menu bar in Mail, choose Mail > Add Account.
2. Select your email provider from the list, then click Continue.
3. Some accounts, such as Google, might ask that you click Open Browser to complete authentication in your web browser.
4. Follow the onscreen instructions to enter account details, such as your name, email address, and password.
II. Set up your Mail
Your configuration suppose to look like this :
1. You're going to click on "Mail" --> ""Add an email account"
Once you've choose this option, you are going to put the email that is saved on your DirectAdmin or Plesk.
Username : youremail@yourdomain
Email Account : youremail@yourdomain
Password : The password that corresponds to your email account
2. Once you add your email, another tab will appear that asks for more information.
You will put :
Email address: Already assigned (youremail@yourdomain).
Username: youremail@yourdomain
Password: Already assigned (password that corresponds to your email)
Type of account: You can choose between IMAP or POP
Receiving server (IMAP ou POP)
Receiving server : server.ikoula.com
Sending server : server.ikoula.com
You're going to click on "Connect" and you'll receive an error message.
It is completely normal due to the fact that the ports haven’t been assigned you’ll get and error message.
You'll have to click on "Connect" once again and they'll ask you if you would like to use the applications that are included in "Mail" which are Mail and Notes. You can keep the selected applications.
3. Once that is done your email will be added your "Mailbox".
You will right click on the email you just added and select "Edit youremail@yourdomain "
Once you have selected the email modification in question, you will uncheck the box "Automatically manage connection settings" and you will put the ports.
It should look something like this:
Receiving server (IMAP or POP) :
-->Username: youremail@yourdomain
-->Password : Already assigned (password that corresponds to your email)
-->Hostname: server.ikoula.com
-->Port 143 (IMAP) 110 (POP)
-->Authentification : Password
Sending server (SMTP)
-->Account : youremail@yourdomain
-->Username : youremail@yourdomain
-->Password : Already assigned (password that corresponds to your email)
-->Hostname : server.ikoula.com
-->Port : 587
-->Authentification : Password
