How to install my Server with KVM+ISO
en:How to install my Server with KVM+ISO fr:Comment installer mon serveur dédié KVM +ISO
Introduction
- Once you have received your access to your KVM, you will be able to add your ISO yourself.
What does KVM mean? What is it for?
Acronym : Keyboard Video Mouse.
The KVM also called KVM deport, KVM extender or KVM extender is a standalone system that allows to deport a user station including one or more screens as well as the mouse and a keyboard.
Installation of your ISO via KVM
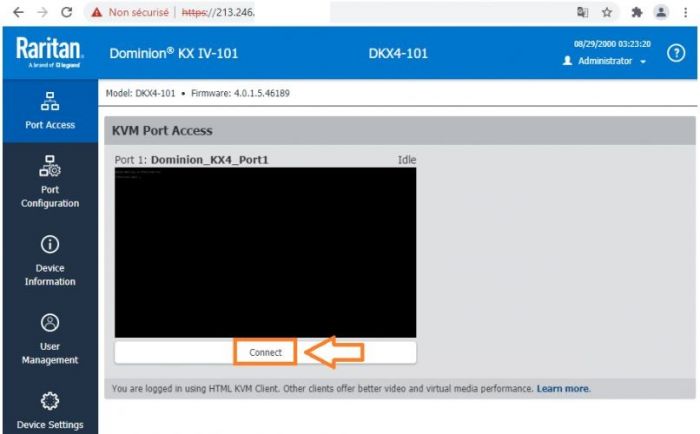
● First of all this connect to your KVM with the identifiers that you received following your KVM request.
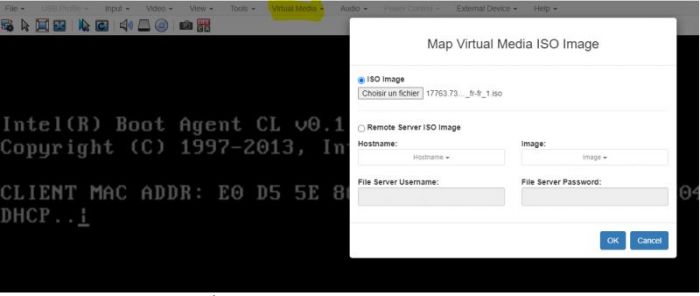
● Then, once in the interface, go to the Virtual Media tab.
- Here you can add your image, choosing an .iso in your computer.
Once the ISO is added,
● Go to the Input tab of your KVM to do a Ctrl+Alt+Dell which allows you to restart the server.
● You can then click Dell (Delete) to access your BIOS. (The key to access the BIOS may be different depending on the version).
In your BIOS
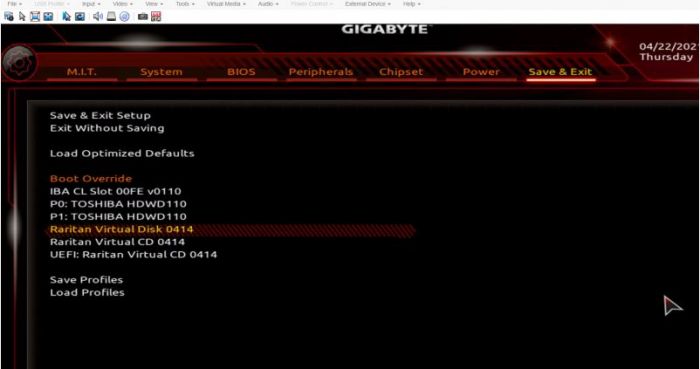
● Go to the BIOS tab and make sure that UEFI : Raritan Virtual CD is first in the boot order.
● Then go to the Save & Exit tab and select in Boot Override -> Raritan Virtual CD -> Press Enter (here the example is with a Raritan KVM).
The image presented below can be different depending on the BIOS version.
- After that your server reboot and proceed to the installation of your OS with the ISO previously added by you.
Conclusion
I hope this article has helped you to install your operating system through a KVM.
If you have any questions or need help, please feel free to contact us at https://fr-wiki.ikoula.com/fr/Ouvrir_un_ticket_au_support_Ikoula /Support
Installation of your ISO via with KVM LANTRONIX Spider
Pre-Requirements
- Have Java installed on your computer version 7 (later versions do not support TLS 1.0).
- We recommend the use of Mozilla Firefox browser.
● First of all connect to your KVM with the identifiers you received after your KVM request. ● Then, once in the interface, go to the console.
- Un fichier vous sera télécharge que va vous permettre d'accéder a la console.
- Veuillez bien enregistrer ce fichier et de l'ouvrir.
Debug JAVA
- Il se peut que votre JAVA n'accepte pas la connexion. Pour cela, vous devez ajouter une exception.
- Veuillez bien consulter sur ce site "Comment configurer la liste des sites avec exception ?"
https://www.java.com/fr/download/help/exception_sitelist.html
- Une fois l'exception fait sur le sécurité JAVA vous pouvez ouvrir le fichier télécharge est vous avez cette image.
- Veuillez cliquer sur continuer.
Upload de l'ISO
- Sur la console Veuillez bien Cliquer sur (suivez les étapes 1/2/3):
- est votre ISO é Uploaded.
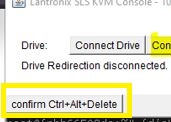
- Il faut maintenant reboot le serveur, par ça veuillez cliquer (Confirm Ctrl+Alt+Delete)
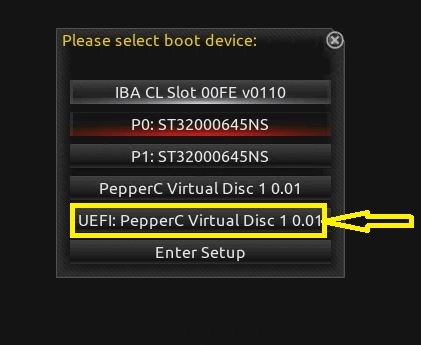
- Durant le reboot du serveur veuillez bien Appuyer sur (F2) afin de choisir sur ou boot, en alternative vous pouvez le définir sur la BIOS dans l'ordre de BOOT (Vérifier chapitre dans le BIOS).
- Veuillez cliquer comme indique l'image.
Conclusion
J'espère que cet article vous a aidé à installer votre système d'exploitation à travers un KVM.
Pour toute question ou aide, n'hésitez pas à nous contacter https://fr-wiki.ikoula.com/fr/Ouvrir_un_ticket_au_support_Ikoula /Support
