Difference between revisions of "Mail on Windows 10"
| Line 1: | Line 1: | ||
| − | |||
<br /> | <br /> | ||
This article has been created by an automatic translation software. You can view the article source [[:fr:Mail sur Windows 10|here]].<br /><span data-translate="fr"></span> | This article has been created by an automatic translation software. You can view the article source [[:fr:Mail sur Windows 10|here]].<br /><span data-translate="fr"></span> | ||
| + | |||
<!-- Début de l'article. Placez votre texte ci-après et n'hésitez pas à personnaliser les chapitres selon votre besoin --> | <!-- Début de l'article. Placez votre texte ci-après et n'hésitez pas à personnaliser les chapitres selon votre besoin --> | ||
| Line 8: | Line 8: | ||
| − | ==== <!--T:1--> | + | ==Introduction == <!--T:1--> |
| − | [https://express.ikoula.com/fr/exchange2010 box ex10 (Exchange 2010 or 2013)] "" 10 | + | This documentation describes how to configure a [https://express.ikoula.com/fr/exchange2010 box ex10 (Exchange 2010 or 2013)] in the client "mail " by default by Windows 10 |
| − | ==== <!--T:2--> | + | ==Place == <!--T:2--> |
| − | 10 | + | The configuration of the mail on Windows box 10 is done quickly and easily. |
<!--T:6--> | <!--T:6--> | ||
| − | "" : | + | To start, in the search field, yor must enter "Mail " : |
<!--T:7--> | <!--T:7--> | ||
| Line 21: | Line 21: | ||
<!--T:8--> | <!--T:8--> | ||
| − | "" 10 : | + | It then clicks the result, which opens the interface "Mail " Windows 10 : |
<!--T:9--> | <!--T:9--> | ||
| Line 27: | Line 27: | ||
<!--T:10--> | <!--T:10--> | ||
| − | : | + | On this interface, click on the notched bottom wheel to open settings : |
<!--T:11--> | <!--T:11--> | ||
| Line 33: | Line 33: | ||
<!--T:12--> | <!--T:12--> | ||
| − | "" "". | + | Here, yor click on "Accounts " What opens the window for adding an account. Then just click on "Add account ". |
<!--T:13--> | <!--T:13--> | ||
| − | : | + | The select account type window opens : |
<!--T:14--> | <!--T:14--> | ||
| Line 42: | Line 42: | ||
<!--T:15--> | <!--T:15--> | ||
| − | "" : | + | In our case, clicked on "Exchange " This window : |
<!--T:16--> | <!--T:16--> | ||
| Line 48: | Line 48: | ||
<!--T:17--> | <!--T:17--> | ||
| − | : | + | We enter our email address, this opens the following window where we enter our password for mail box : |
<!--T:18--> | <!--T:18--> | ||
| Line 54: | Line 54: | ||
<!--T:19--> | <!--T:19--> | ||
| − | "" : | + | It validates and clicked on "completed " : |
<!--T:20--> | <!--T:20--> | ||
| Line 60: | Line 60: | ||
<!--T:21--> | <!--T:21--> | ||
| − | e EX10 | + | And here it is, our box at the Curr e EX10 is configured. |
<!--T:22--> | <!--T:22--> | ||
[[File:Interface bal configuree.PNG|Interface_bal_configuree.PNG]] | [[File:Interface bal configuree.PNG|Interface_bal_configuree.PNG]] | ||
| − | ==== <!--T:3--> | + | ==Conclusion == <!--T:3--> |
| − | 2010 2013 10 | + | From there, your exchange mailbox 2010 or 2013 is configured on your Windows PC 10. You can then send and receive mail from it. For this nothing more simple. |
<!--T:23--> | <!--T:23--> | ||
| − | "", "". | + | Click on "New Message ", the interface will open on the right side the mail as OWA web interface for example do so. Fill in the fields and send the mail with the button "Send ". |
<!--T:24--> | <!--T:24--> | ||
| Line 77: | Line 77: | ||
<!--T:25--> | <!--T:25--> | ||
| − | Les mails reçus apparaissent au milieu de l'interface, comme dans Outlook OWA : | + | Les mails reçus apparaissent au milieu de l'interface, comme dans Outlook or OWA : |
<!--T:26--> | <!--T:26--> | ||
| Line 86: | Line 86: | ||
<!-- Fin de l'article --> | <!-- Fin de l'article --> | ||
<br /><br /> | <br /><br /> | ||
| − | ? <vote /> | + | This article seemed you to be useful ? <vote /> |
<!--T:5--> | <!--T:5--> | ||
| Line 92: | Line 92: | ||
| − | <!-- Placez ci-dessous la les catégories auxquelles se rapporte votre article. Ex: [[Category:Help]] [[Category:Linux]] --> | + | <!-- Placez ci-dessous la or les catégories auxquelles se rapporte votre article. Ex: [[Category:Help]] [[Category:Linux]] --> |
[[Category:HOSTED_EXCHANGE]] | [[Category:HOSTED_EXCHANGE]] | ||
<comments /> | <comments /> | ||
Revision as of 08:10, 24 September 2015
This article has been created by an automatic translation software. You can view the article source here.
Introduction
This documentation describes how to configure a box ex10 (Exchange 2010 or 2013) in the client "mail " by default by Windows 10
Place
The configuration of the mail on Windows box 10 is done quickly and easily.
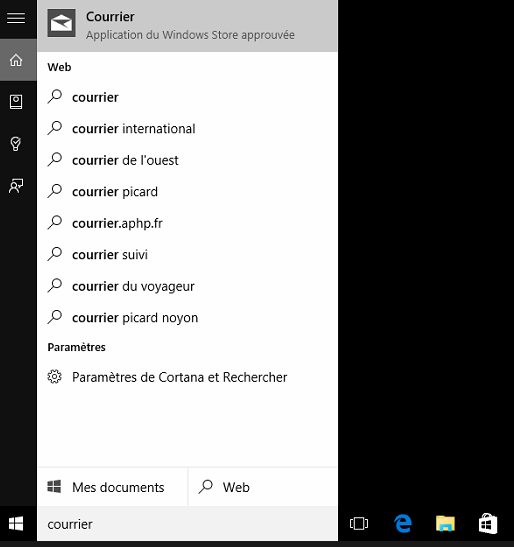
To start, in the search field, yor must enter "Mail " :
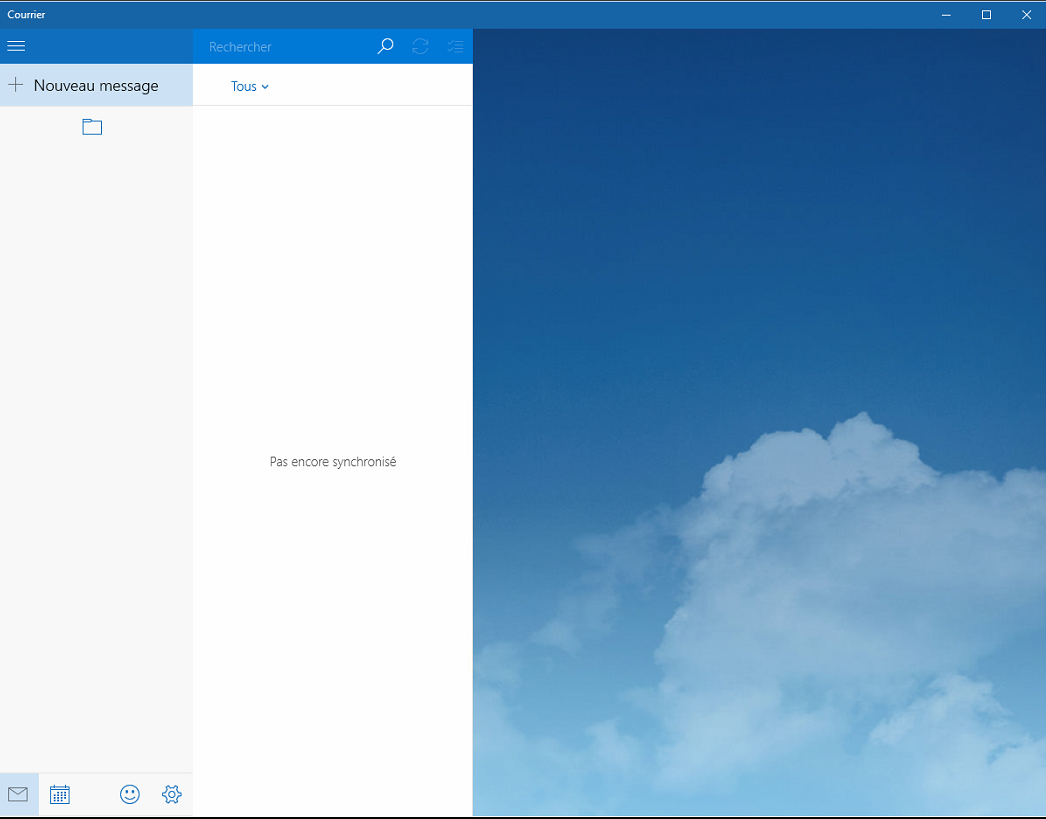
It then clicks the result, which opens the interface "Mail " Windows 10 :
On this interface, click on the notched bottom wheel to open settings :
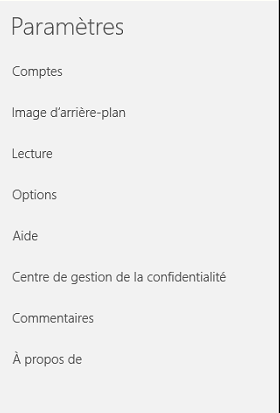
Here, yor click on "Accounts " What opens the window for adding an account. Then just click on "Add account ".
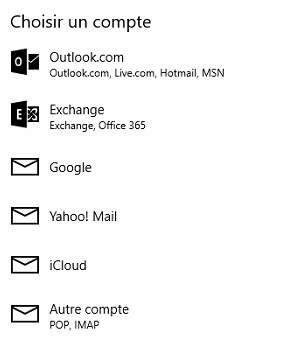
The select account type window opens :
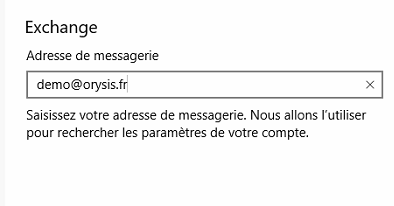
In our case, clicked on "Exchange " This window :
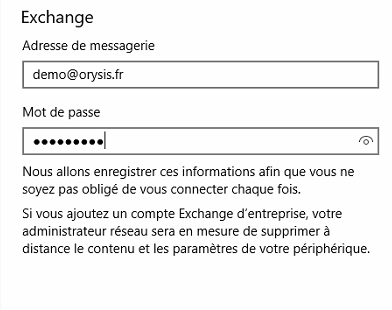
We enter our email address, this opens the following window where we enter our password for mail box :
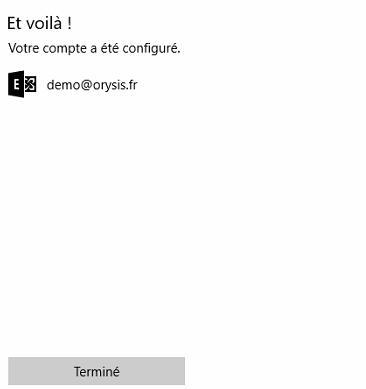
It validates and clicked on "completed " :
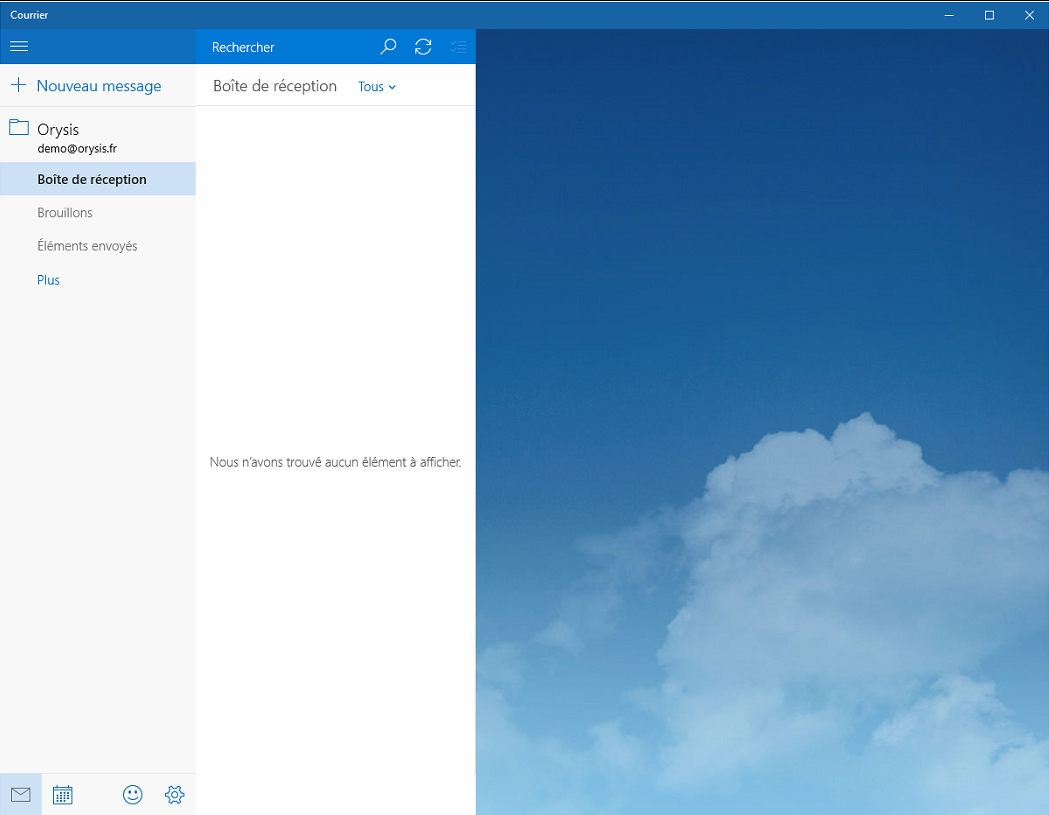
And here it is, our box at the Curr e EX10 is configured.
Conclusion
From there, your exchange mailbox 2010 or 2013 is configured on your Windows PC 10. You can then send and receive mail from it. For this nothing more simple.
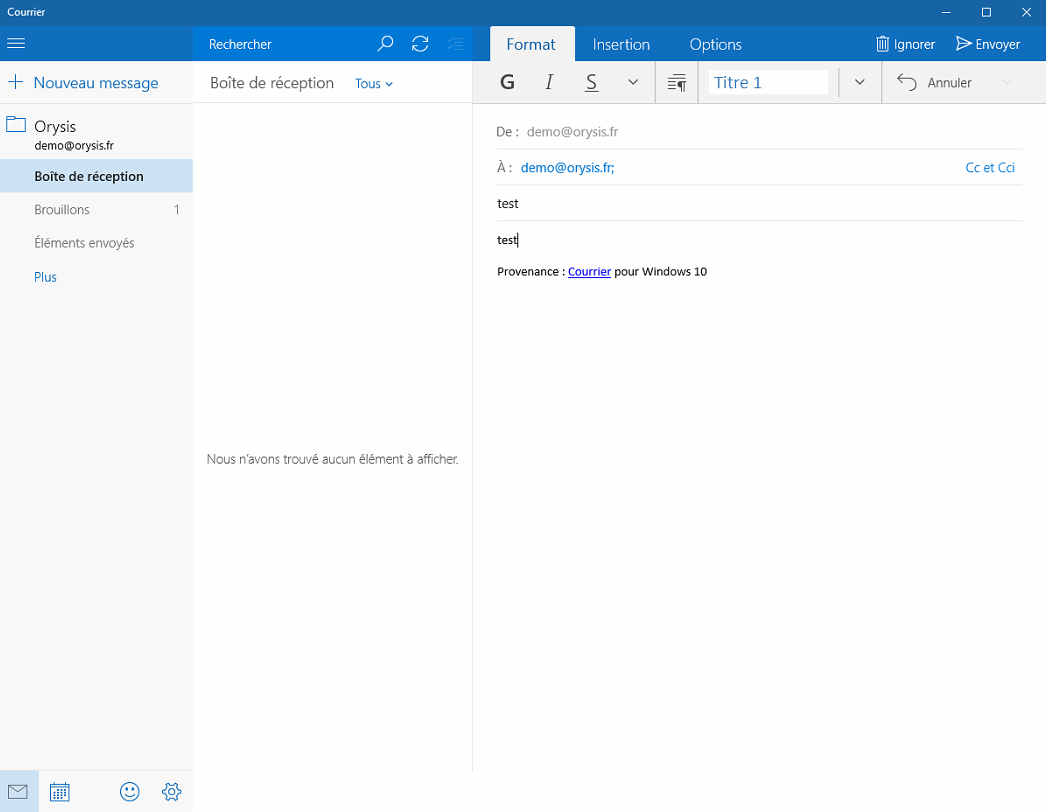
Click on "New Message ", the interface will open on the right side the mail as OWA web interface for example do so. Fill in the fields and send the mail with the button "Send ".
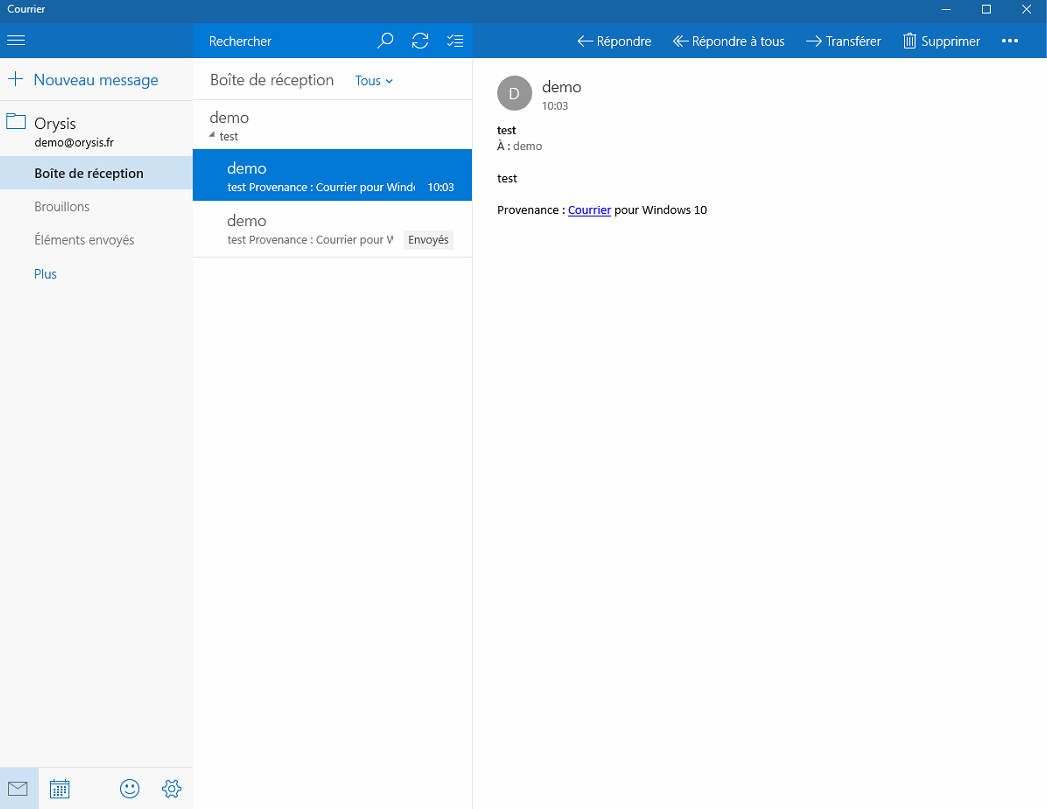
Les mails reçus apparaissent au milieu de l'interface, comme dans Outlook or OWA :
This article seemed you to be useful ?
Enable comment auto-refresher