Difference between revisions of "Outlook 2003 - MAPI configuration"
| Line 1: | Line 1: | ||
| − | < | + | <br /> |
| + | This article has been created by an automatic translation software. You can view the article source [[:fr:Configuration Outlook 2003 - MAPI|here]].<br /><span data-translate="fr"></span> | ||
| − | |||
| − | '''''How to configure a mailbox <span class="notranslate">Exchange</span> on your Outlook | + | '''''How to configure a mailbox <span class="notranslate">Exchange</span> on your Outlook appliCA tion 2003 for a MAPI connection (IE : Exchange avec synchronisation de mails, contacts, CA lendrIE rs, etc.)?''''' |
| Line 29: | Line 29: | ||
5. You then enter the name of the server <span class="notranslate">Exchange</span> and the account to configure : | 5. You then enter the name of the server <span class="notranslate">Exchange</span> and the account to configure : | ||
| − | <span class="notranslate">Microsoft Exchange Server</span>: ''' | + | <span class="notranslate">Microsoft Exchange Server</span>: '''CA s.ex10Also check the ''' |
Username : '''login@votredomaine.cOM ''' (Enter here the email address you want to configure ). | Username : '''login@votredomaine.cOM ''' (Enter here the email address you want to configure ). | ||
| Line 41: | Line 41: | ||
| − | 7. Go to the tab "Security " and | + | 7. Go to the tab "Security " and cochez la CA se Crypter les informations entre <span class="notranslate">Microsoft Office Outlook</span> and <span class="notranslate">Microsoft Exchange Server</span> |
[[File:EX10 ConfOutl03mapi 6.jpg|EX10_ConfOutl03mapi_6.jpg]] | [[File:EX10 ConfOutl03mapi 6.jpg|EX10_ConfOutl03mapi_6.jpg]] | ||
| − | 8. Go to the tab “ConnThen choose under "Proxy authentication settings" "Basic authentication".ion” and cochez la | + | 8. Go to the tab “ConnThen choose under "Proxy authentication settings" "Basic authentication".ion” and cochez la CA se “Se connecter à la boîte aux lettres <span class="notranslate">Exchange</span> . Under 'Connection settings', enter the HTTPS address <span class="notranslate">Exchange</span>Then choose under "Proxy authentication settings" "Basic authentication". |
[[File:EX10 ConfOutl03mapi 7.jpg|EX10_ConfOutl03mapi_7.jpg]] | [[File:EX10 ConfOutl03mapi 7.jpg|EX10_ConfOutl03mapi_7.jpg]] | ||
| Line 53: | Line 53: | ||
9Also check the : Then choose under "Proxy authentication settings" "Basic authentication".10Also check the | 9Also check the : Then choose under "Proxy authentication settings" "Basic authentication".10Also check the | ||
| − | + | Choisissez ensuite sous « Paramètres d'authentifiCA tion proxy » une « AuthentifiCA tion de base ». | |
| − | + | Cocher également la CA se ". The end of configuration appears window. Click Finish." | |
Revision as of 16:15, 23 September 2015
This article has been created by an automatic translation software. You can view the article source here.
How to configure a mailbox Exchange on your Outlook appliCA tion 2003 for a MAPI connection (IE : Exchange avec synchronisation de mails, contacts, CA lendrIE rs, etc.)?
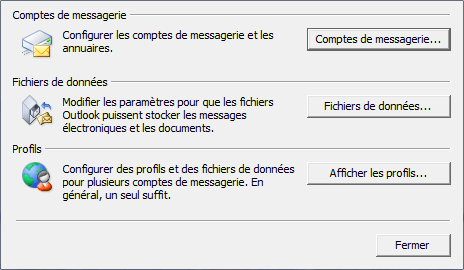
1. Sélectionnez l’icône “CourrIE r” du Panneau de Configuration de votre PC. Si vous disposez déjà d'un ou de plusIE urs cOM ptes mails sur votre PC cliquez sur “Afficher profilsThen choose under "Proxy authentication settings" "Basic authentication".
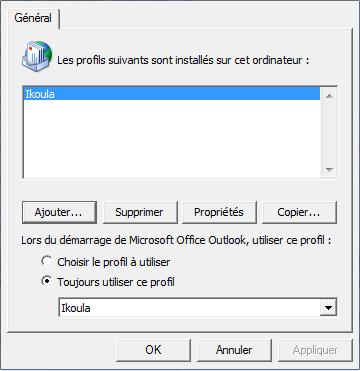
2. Create a new profile by clicking on 'Add'. Write the name of this new profile, and click OK.
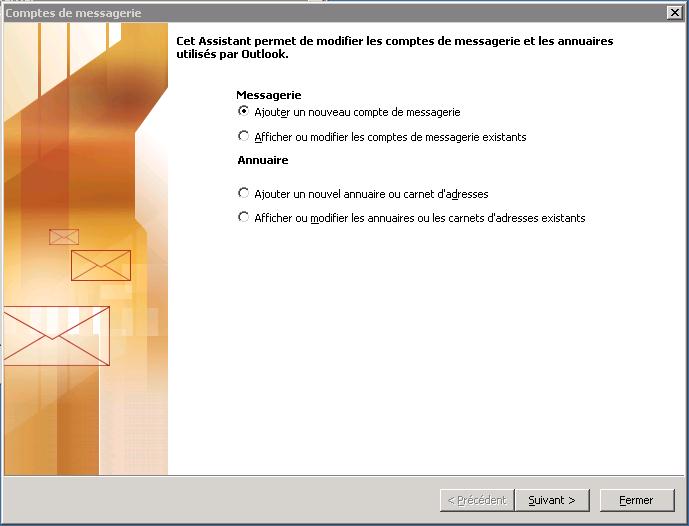
3. A window appears, choose "Ajouter un nouveau cOM pte de messagerIE "
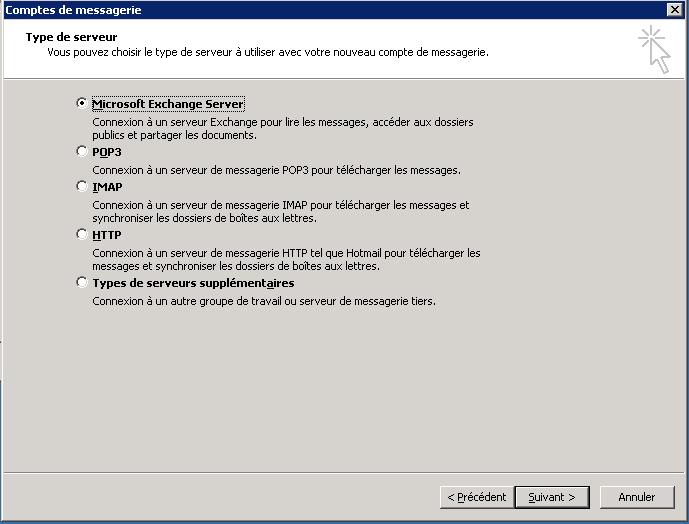
4. The window "Server type " is displayed. Select “Microsoft Exchange Server” and then click NThen choose under "Proxy authentication settings" "Basic authentication".t.
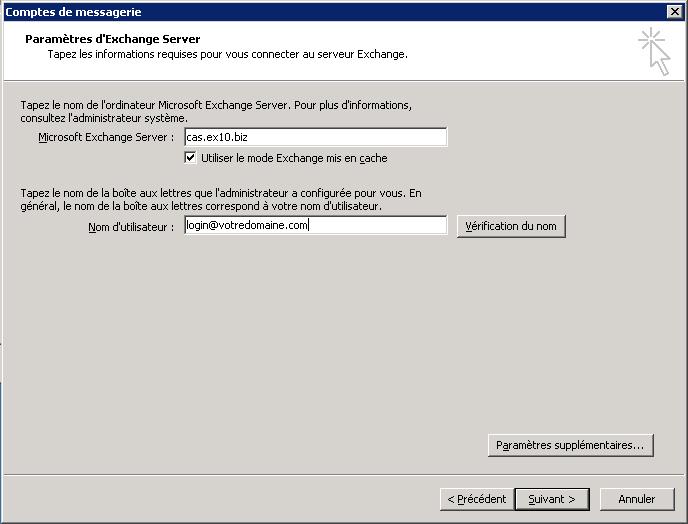
5. You then enter the name of the server Exchange and the account to configure :
Microsoft Exchange Server: CA s.ex10Also check the
Username : login@votredomaine.cOM (Enter here the email address you want to configure ).
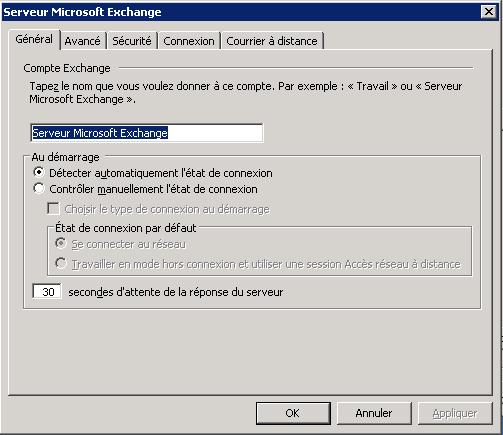
6. Cliquez ensuite sur “Paramètres supplémentairesThen choose under "Proxy authentication settings" "Basic authentication". The window de configuration de l’accès au Serveur Exchange appears :
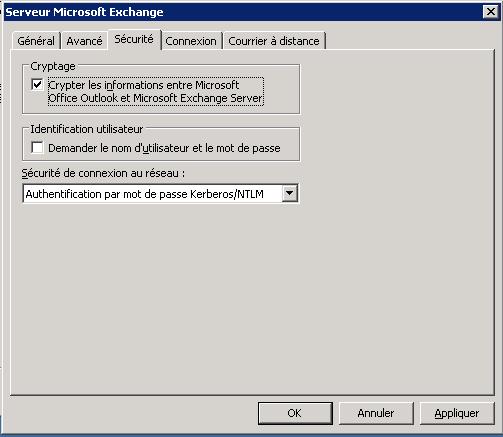
7. Go to the tab "Security " and cochez la CA se Crypter les informations entre Microsoft Office Outlook and Microsoft Exchange Server
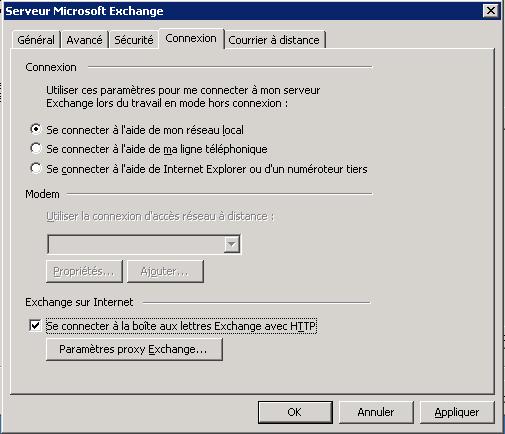
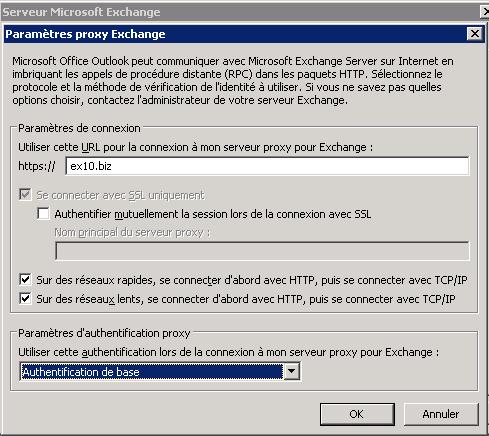
8. Go to the tab “ConnThen choose under "Proxy authentication settings" "Basic authentication".ion” and cochez la CA se “Se connecter à la boîte aux lettres Exchange . Under 'Connection settings', enter the HTTPS address ExchangeThen choose under "Proxy authentication settings" "Basic authentication".
9Also check the : Then choose under "Proxy authentication settings" "Basic authentication".10Also check the
Choisissez ensuite sous « Paramètres d'authentifiCA tion proxy » une « AuthentifiCA tion de base ».
Cocher également la CA se ". The end of configuration appears window. Click Finish."
10. The window de fin de la configuration apparait. Cliquez sur Terminer.
Enable comment auto-refresher