Difference between revisions of "Configuring mail Hosted Exchange on iPhone"
| Line 1: | Line 1: | ||
| + | <span data-link_translate_es_title="Configuración de correo electrónico Hosted Exchange en iPhone" data-link_translate_es_url="Configuraci%C3%B3n+de+correo+electr%C3%B3nico+Hosted+Exchange+en+iPhone"></span>[[:es:Configuración de correo electrónico Hosted Exchange en iPhone]][[es:Configuración de correo electrónico Hosted Exchange en iPhone]] | ||
<span data-link_translate_fr_title="Configuration mail Hosted Exchange sur iPhone" data-link_translate_fr_url="Configuration_mail_Hosted_Exchange_sur_iPhone"></span>[[:fr:Configuration mail Hosted Exchange sur iPhone]][[fr:Configuration mail Hosted Exchange sur iPhone]] | <span data-link_translate_fr_title="Configuration mail Hosted Exchange sur iPhone" data-link_translate_fr_url="Configuration_mail_Hosted_Exchange_sur_iPhone"></span>[[:fr:Configuration mail Hosted Exchange sur iPhone]][[fr:Configuration mail Hosted Exchange sur iPhone]] | ||
<br /> | <br /> | ||
Revision as of 13:54, 29 September 2015
es:Configuración de correo electrónico Hosted Exchange en iPhone
fr:Configuration mail Hosted Exchange sur iPhone
This article has been created by an automatic translation software. You can view the article source here.
We'll ex plain, step by step, how to configure a mailbox Exchange on your iPhone application ::
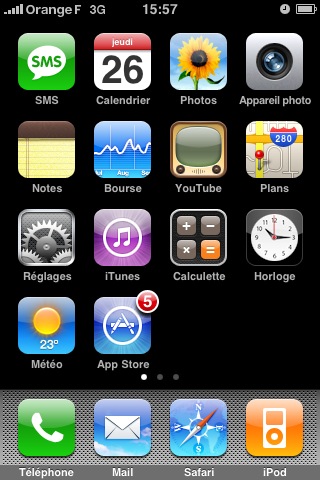
1. When you are on the home screen of your iPhone, you must then click on the button "Settings ".
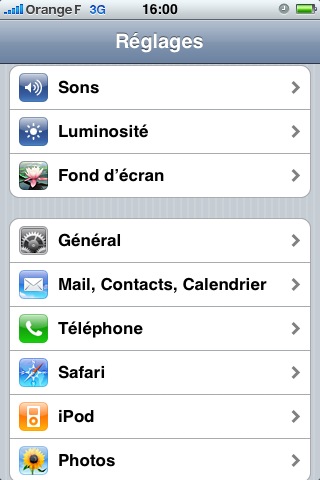
2. Once you are in the menu Settings then you have to click on "Mail, Contacts, calendars "
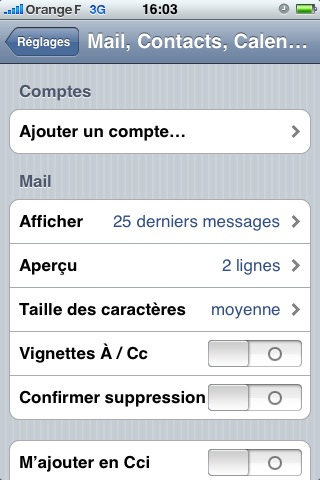
3. You can change the menu according to General settings for the consultation of your mails.
In our case, we simply look at the menu "Add an account....".
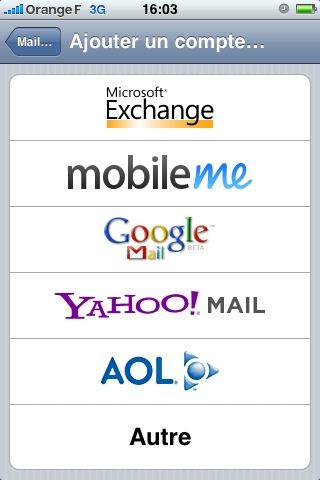
4. Then you have the different types of ex isting account proposal.
In our case, so let's choose "Microsoft Exchange".
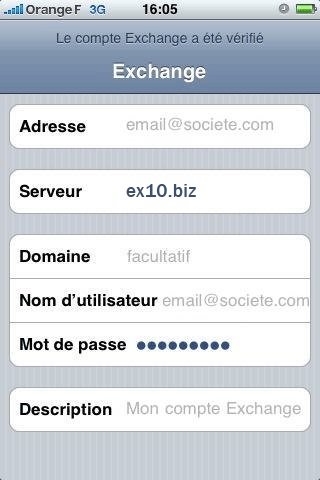
5. It is here that begins the configuration of your mail box. You must complete the information as follows :
Address : You should specify here your e-mail address
Domain : Do not put anything here
Username : Put here the address of Login which you have been provided.
Password : Put here your password
Description : It's just the name of the account, you can put what you want here.
6. Once your system has verified your information so a new field will appear in the configuration page.
You must be filled as follows :
Server : ex 10.biz
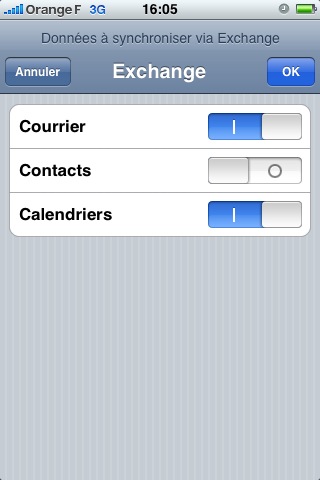
7. If all the information is correct then you this window asking you what you want to configure.
You see what you want to synchronize on your iPhone.

Enable comment auto-refresher