Difference between revisions of "DNS modification for Microsoft 365"
⧼vector-jumptonavigation⧽
⧼vector-jumptosearch⧽
(Created page with "<span data-link_translate_fr_title="Modification DNS pour Microsoft 365" data-link_translate_fr_url="Modification DNS pour Microsoft 365"></span>:fr:Modification DNS pour Mi...") |
(No difference)
|
Latest revision as of 15:03, 5 April 2023
fr:Modification DNS pour Microsoft 365 en:DNS modification for Microsoft 365
Introduction
Once you have added your domain to Microsoft 365 you will need to update your DNS zone to add the Microsoft values to send and receive emails.
Prerequisites
- A Microsoft 365 package to have access to the administration. (Available here: https://www.ikoula.com/en/microsoft-365-suite-professionals
- A domain name that belongs to you (Available here: https://www.ikoula.com/en/buy-a-domain-name)
- Have linked your domain to your Microsoft 365 service: https://en-wiki.ikoula.com/en/Link_your_domain_to_Microsoft_365
Process
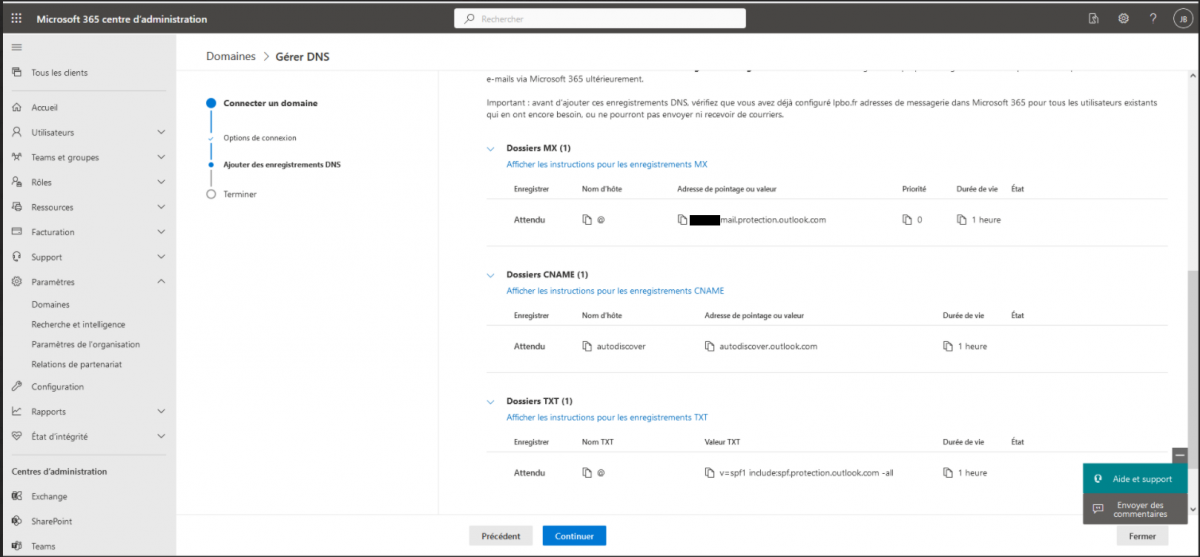
Log in to the Microsoft 365 management interface: https://admin.microsoft.com Click on Settings then Domains, then click on Manage DNS Scroll through Microsoft's explanations until you get to the "Add DNS records" page as in the following capture:
You will then need to add these three records to your DNS zone and verify that the DNS replication is working properly.
You can check the DNS replication here: https://dnschecker.org/
Conclusion
Your email address is now ready to be used.
